Showing posts with label No-Spend July. Show all posts

Tuesday, July 3, 2012

2nd Annual No-Spend July!


I was just driving down the road today, and realized- it's July!
If you remember from last year, I decided to celebrate "No-Spend July". For the second year now, I have again vowed to not spend money on anything extra for the entire month. I hope to do the same as last July, and not spend on anything- not just crafts, but clothes, shoes, etc., too. It's really not as difficult as I thought, and it's a really good thing in some ways. For example, the most obvious positive is that it saves some dough. It also gives me time to catch up on my projects that are lined up... which are MANY as of right now, let me tell 'ya! I hope to be posting projects like a mad woman during this month. That is, as long as the weather will cooperate. I have some things lined up to spray paint, but it is nowhere near spray paint weather right now.

Another advantage is that it lets me realize just how unimportant material things are. I can do without so much. I hope to learn even more during this second time around. I'll keep you posted!

Just a quick post here- I have a following post coming right after this one, so stayed tuned...

Wednesday, January 25, 2012

Rooster Table Re-Do


Ok, just a little preface before we get started. First of all, I was almost about to title this post Cocka-Doodle-DON'T, but I didn't. That may be too cheesy, even for me. Also, this is sad, but I admit- this table revamp began as a "No Spend July" project- the date on this post's draft is 7/5/11. Isn't that sad?? I first sanded & painted it (the hard parts), then it sat, and sat, and sat, and I didn't touch it for months. Until just this weekend (which was one of the most productive weekends ever!), and it only took a few minutes to finish.
Oh well, now that that's out of the way... :)

I am so excited about the way this table turned out that I am going to commit a cardinal sin & post my After picture first off.
I can't wait any longer!


Oh, I love it!! Now, for the details...

If you do love roosters, I apologize in advance. They just don't go with the design in our house.

Oh, me. This ugly little rooster table...

BEFORE


...was purchased at a resale shop in Birmingham. I was desperate for a small table to place a plant on that had nowhere else to go.
I knew the plant would cover up the lovely rooster, so I didn't worry about it. I loved the design around the edge, which is the only part that shows. But, now that I've gotten more into painting, I thought this would be the perfect, cheap piece to practice on.
If I ruined it...well, it couldn't get much worse.

I waited a while at first, because it was WAY too hot outside to spray paint. (As I said before, this was another No-Spend July project that I'm just now getting around to finishing.) I also had some stencils that I wanted to use on something. This was finally the project for them, and I LOVE how it turned out!!

AFTER (in steps)

I started by sanding away. The poor little rooster became a faint picture in a hurry. Yay!


Then, I spray painted it with red paint (cheap-o from Dollar General) all over the smoothed surface. This shows it after just one coat:


I didn't bother to cover the legs before I painted- I sanded them off after painting, and they looked just as before, with a little red mixed in to tie the color of the legs & table together. I then sanded over the tabletop a little to smoothe it out even more, then sprayed one more coat of the pretty red.


(The above pic shows it on a different day than the previous one, so the bright sun makes the red look differently.)

*Sidenote: After this step, I brought the table back inside the house and stupidly placed the plant back on it until I could get around to the stenciling. A few days later when I was ready to stencil, I picked up the plant and noticed the grooves on the bottom of the pot had made indentions on the painted tabletop. Ugh!! I can't explain how frustrated I was. I took the table back outside, sanded & painted again, but it never looked the same after that. The surface is still uneven, which kills my perfectionist self, but I got over it. I have to let go of that when I paint. No one will ever notice details like that but me. So, this time, I got over it and just began the next step... after a few months had passed, that is. :)

After bringing the table back inside, it did sit for many months- July to January, to be exact. I guess I just wasn't in the mood to finish it up. Weird how one day month you can be excited about a project, then the next, you just lose interest. Anyway, it's done now, and that's what matters...

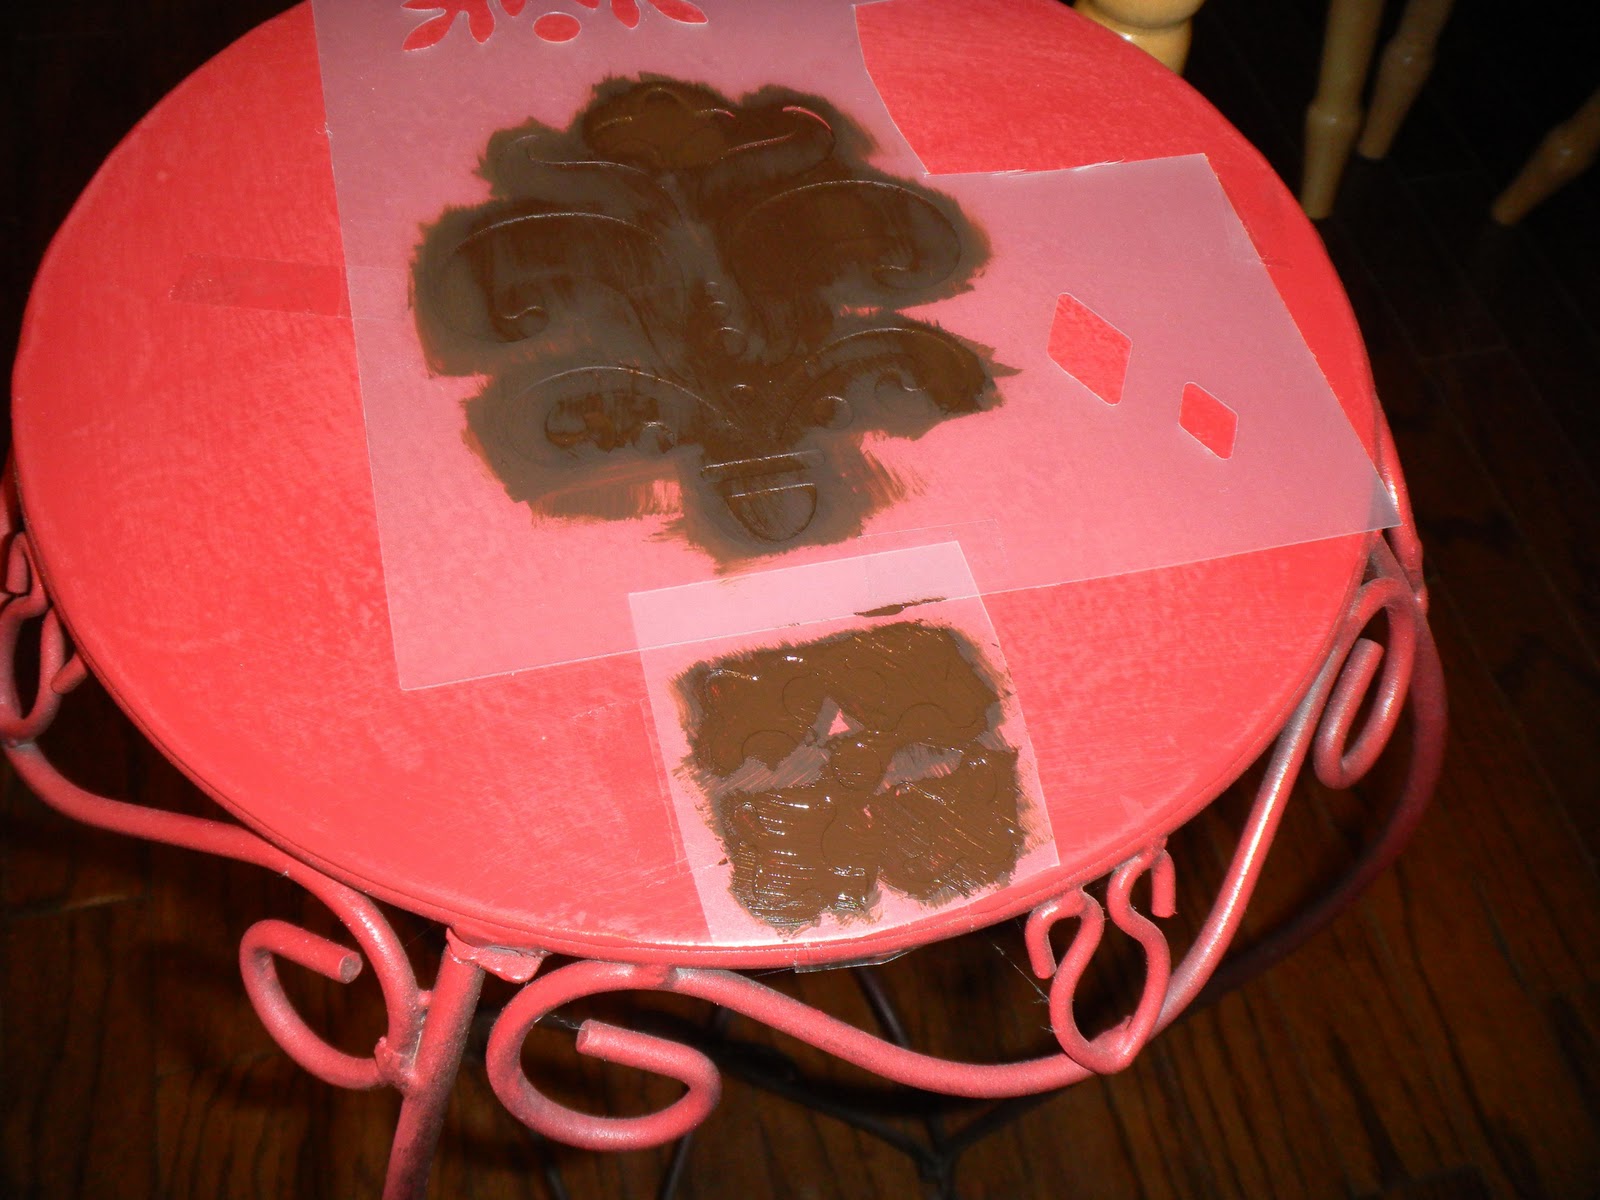
I sanded the top again, just to make a better surface for the acrylic paint. Next, I used the stencils. I taped them along the edges, and used brown acrylic paint to paint inside the stencils. I love the center design so much, I don't want to cover it back up with the plant. I guess we're back to square one now, trying to find a new home for the plant. Ha!

Here are some photos of the steps. Some look a little rough, but they were all steps to get to the finished product.

First coat with stencil...


Second coats with center stencil & edge stencil...


Working my way around with the stencils & two coats on each...
I know the red looks rough since I sanded it, but no worries- it turned out beautifully!


This shows the first coat of Mod Podge drying, while I sanded some of the red paint off of the legs.


I posted this pic in black & white, because it better shows the coverage of the Mod Podge. This is just after the first coat. I did a few more after this one, just for good measure.


Here's a close-up shot of the detail...


I did several top coats of Mod Podge, because I knew I would have a plant (with water) on top of this table. I wanted lots of protection for this baby. The only thing I may change is sanding the legs a bit more. Other than that, I'm so happy about my second time ever to paint furniture! (You can see my first here.)

So, a quick Before & After for the lazies who don't want to keep scrolling back & forth (myself included):

BEFORE


AFTER


Bye-bye, birdy! :)

Linking this up to...


...and many others!

Monday, September 26, 2011

Calendar Vinyl


Yet another No-Spend July project that I have just recently wrapped up! Let me tell you, I have had the stuff for this project for a really long time. I think I was honestly just a little nervous to use the vinyl. I was so afraid I wouldn't get it on straight! It did turn out to be a pain in the you-know-what, trying to get it straightened, lined up, all while smoothing out the air bubbles, but I love the way it turned out!

I had ordered a cute little calendar vinyl from a GroopDealz email a long time ago. This is the second time I have ordered something from them, and I love how it works,
not to mention the great deals!

I had the project finished, but then wanted to change it up.
So, I'll do a little something different here and go ahead
and show you the final product...


I love it!!

Starting off, I knew I would have to find something to put the decal on. The instructions that came with the vinyl said it could be placed right on the refrigerator, but I knew how that would end up. We would have a white fridge covered in dry erase marker that I would constantly be cleaning. I always want to try to repurpose something I already have instead of buy something new, if at all possible. (Keep in mind, this began as a No-Spend July project). So, I rummaged around the junk room guest room for something to use and found this little prize:


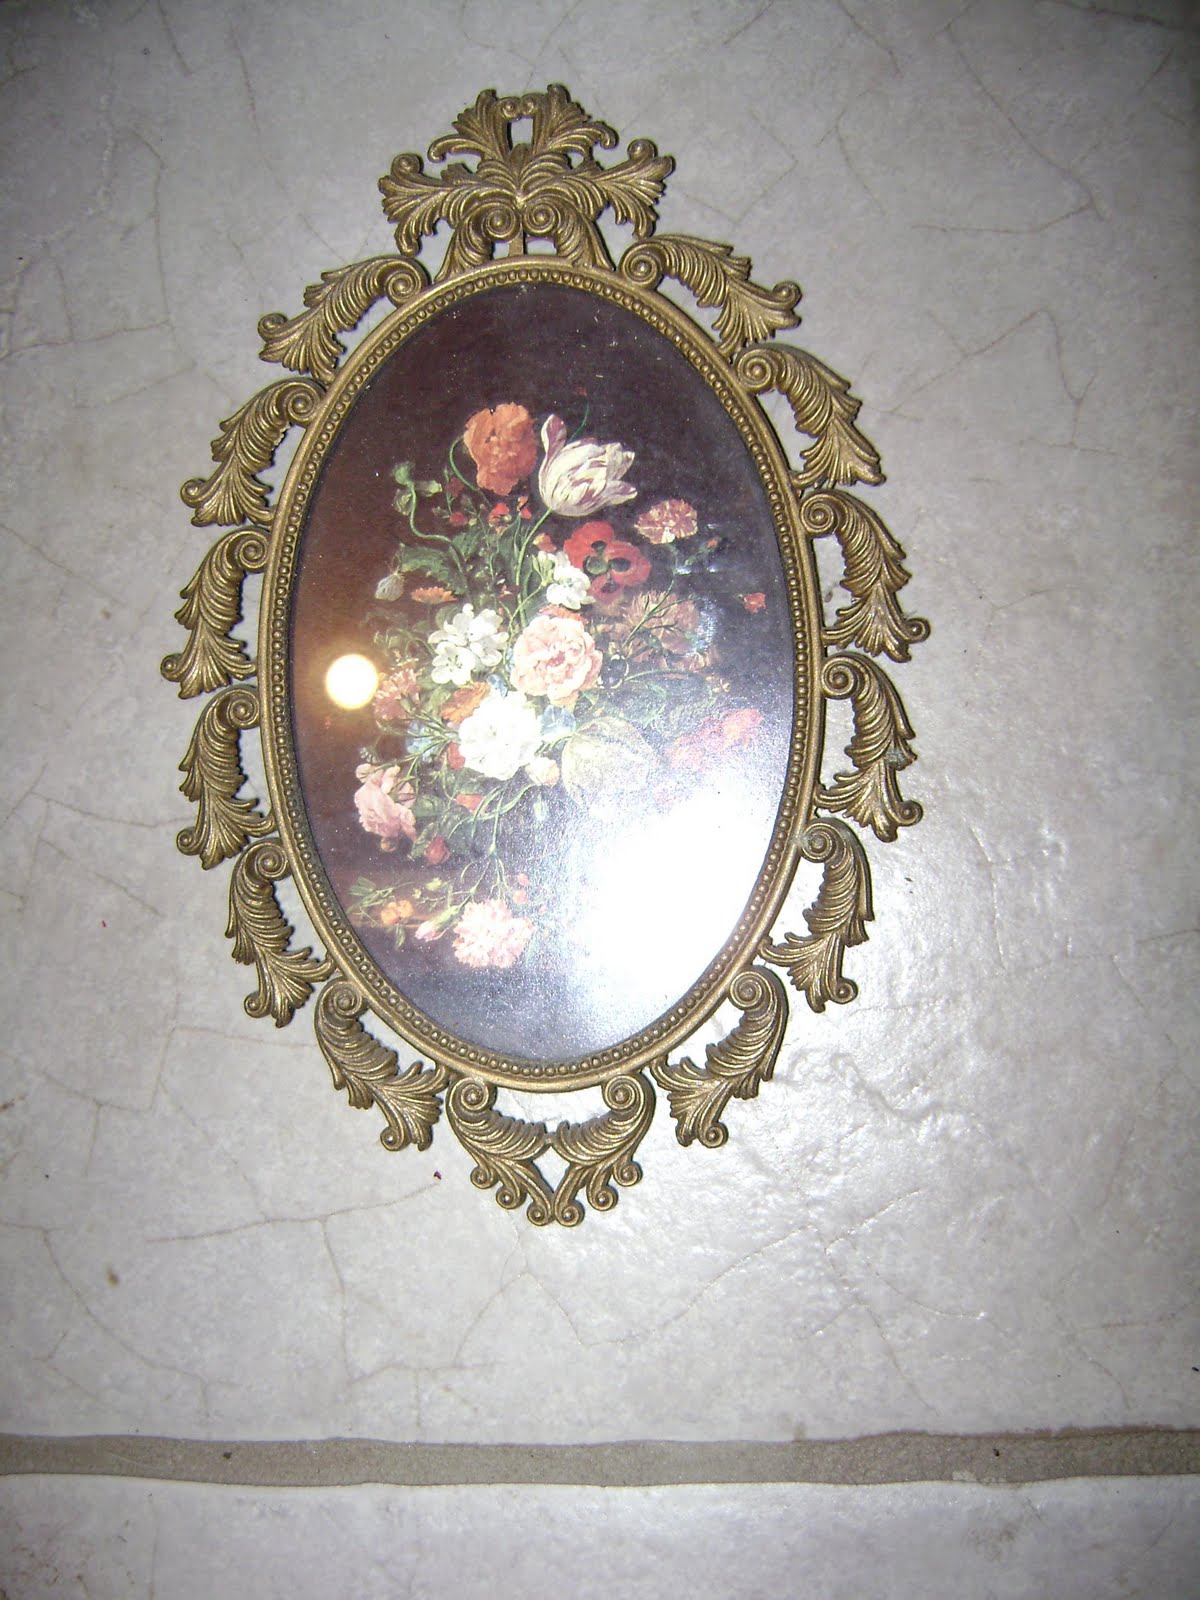
Haha! This was taken over 8 years ago now, by the way. Ugh, makes me feel old! Needless to say, this hasn't been hung up on a wall in a long time. It came from Zach's old room at his dad's house. Aww. :) I took the photo & glass out, spray painted the frame in black (free, taken from Mom's- also used on the jewelry tray makeover project) and covered the backing with red posterboard ($1 for 2 at the lovely Dollar Tree),
then stuck the vinyl on the cleaned glass. 

Here are the steps:

I removed the glass from the frame first and cleaned it. Then, I spray painted one coat of Krylon Gloss Black on the frame.
One coat was all it took.


Then, I had to find a large enough piece of paper for the backing. I was perusing the Dollar Tree and found posterboard. I wanted it red to give it a little color. I then carefully stuck the vinyl on the glass (easier said than done).

 
I looked at it, and kept thinking about changing up the background paper. I really wasn't loving the bright red in the area I had planned to hang it up. It's so easy to change up the background too, if I ever want to change it again in the future. Who knows, if I'm feeling really crafty, I could use coordinating scrapbook paper and decorate for all seasons. Ha, big "IF."

I remembered the lovely zebra print paper that I have used on many projects already, including the projects here, here and here. Love that linky tool. :) So, that brings us to finished product once again...


I'm wanting to create a little organizational hub in the laundry room- somewhere to put loose important papers & keep up with important dates. One laundry room wall is completely empty & it's the perfect place, because it is usually only seen by me & Zach. So, my calendar is now waiting to be hung up in our laundry room (ahem, Zach), along with a framed corkboard that I bought probably about a year ago now. Things aren't hung up on the walls in our house very often, as you can tell. :)
 

Wouldn't these look great hung up on the wall near each other? Maybe soon! :)

Friday, August 26, 2011

I've Been "Framed"


I have been in a project rut lately. I have had so many things lined up, and I even have all of the supplies for them (so I can't use that as an excuse), but just haven't really felt like getting any of it done. I have been cooking a lot more lately, so maybe that's where my passion has been residing. I finally snapped out of it, and started working like a mad woman.
Hopefully many new posts will follow soon!

So, I am obsessed with picture frames.
I am absolutely drawn to them!

I am in love with three different frames I have "remodeled," and wanted to share their simple transformations with you.

I posted this find from the thrift store months ago...


I knew exactly what I wanted to do with it...

(Sorry, these next photos are iPhone photos.
Get used to it- it's handy.)

I started with removing the backing, and slapping some
Mod Podge on it:


Next, I cut out the infamous zebra paper to fit, and placed it
on top of the Mod Podged backing:


Then, I let it dry, and Mod Podged the top:


I bought a neat little pack of letters at Wal-Mart for like $2. I grabbed out a "J", and sprayed it with red spray paint. I then glued the red "J" in the center of the frame, and voila! The "J" is not quite as big as I wanted it to be on this frame, but I didn't want to take away from the zebra background either. I can live with it.

BEFORE


AFTER
  
(Notice a few little bubbles in the paper. Let this be a lesson kids, don't get too excited and forget to smoothe out the paper
before you Mod Podge.)
 
I think I have posted a pic of these before, fresh from the thrift store, but here they are again:


Lovely! :)

I always check the backing before I buy.
These backings are simply screwed in.


So, I used my little screwdriver (well, Zach's screwdriver) and it took me all of 2 seconds.


Here they are laid out and anxiously waiting to be painted:


I didn't include a pic of them after they were first painted. I think it takes away from the finished product. And, plus, I tend to be in a hurry & get messy. I get just a little excited. There's usually more spray paint on the paper than the actual thing
being painted. :)

And, for my favorite part...the Before & After,
showing the finished product:

BEFORE

AFTER
  
I am planning on getting a couple of black & white wedding pic prints, one of me & one of my groom, to put in these. I may post a follow-up on these once they're completely done so you can see the true finished product!

Hope you enjoy my simple transformations! Hope all is well with everyone, and you're all gearing up for Fall. I am so excited about it!! I even had Zach drag my Fall stuff out of the basement a couple of weeks ago. I haven't set it out yet, but I'm pretty sure
by this weekend, I can say differently. :)

Monday, August 8, 2011

I'm Back, Baby!


(Seinfeld reference for my Zach.) :)

What an awesome weekend we had! I got lots of shopping done, Zach got an iPad (oh me, I'll never see my husband again), we went to church, and we got to spend lots of time with family, which is always wonderful! Hope you all had a great one too!

Yep, the old shopping Ashley is back. I made it back to the thrift store one day last week, after a month away in July. WOW, it felt good! That place was missing me, I just know it. I got just a few things, but I did notice myself thinking a little more about what I would pick up. I like that. :)

I grabbed these 3 candlesticks up as soon as I saw them. I love these kinds of things, unfortunately. I thought I would be hitting these with spray paint, but I placed them in the house and loved the way they looked! Here they are in their new home:


I kept going back to this one. I even laid it back down once, then came back to it. I'm thinking it will be filled with hydrangeas or some kind of colorful flower. I have ideas.


I got this little $.50 silver tray for a transformation project. Don't worry about the spots...Hopefully, this will be a little chalkboard one day. Soon.


This little contraption looks strange, I know, but it will have a purpose. It will. I'll post on that soon.
(Lots of promises in this post so far, huh?)


I'm laughing just thinking about this one. I bought a VHS tape.
I can't remember the last time I actually bought a VHS, or watched a VHS, but I love this movie, and it was priced at 2 bucks. Sold!

 
May not be exciting for you, but it was for me.
It felt great to just buy something. Is that wrong?? :)

Tuesday, August 2, 2011

Goodbye, No-Spend July!


IT. IS. OVER.

No-Spend July is done. I'm so glad it is now August. I did somewhat enjoy disciplining myself during the month of July, not allowing myself to spend anything on craft supplies, new clothes, shoes, jewelry, purses, etc. Basically, anything frivolous. No impulse purchases, which happens fairly often with me. It was difficult at times- especially when, stupid me, I joined in on a shopping trip with my mom and grandmother. What was I thinking?? I found several cute things that day that I wanted, including the cutest top I think I've ever seen...the same one that Mom bought for herself that day. Talk about coveting your neighbor's property. Ridiculous! I went to a local store yesterday that I thought would have it, but with no luck. However, I've already planned a shopping trip this weekend with Mamaw Helen to try to find the top. If not, it's not meant to be. If so, this will be my little present to myself for sticking to it. I came out of this learning that I don't have to buy everything I see that I want. I can do without so much.
Saving money is so much more rewarding than spending it!! 

I also made a quick trip to the Dollar Tree yesterday. I had actually stopped by there one day last week to scout out some things. Yes, it's sad that I actually went to the store to plan things for future purchase. Yes, I know it is also sad to get excited about going to the Dollar Tree, but I was. Plus, I'm still giddy about my feature post. I am so grateful for all the encouraging comments I've received. I still can't believe it! All the encouragement makes all the work I do on my little projects so worthwhile!

So, I got my things at Dollar Tree, which was nice. Some were actually things we needed and a few were for projects. I had started a lot of little projects during my no-spend month, but had little odds-and-ends I needed to buy to finish them up. It felt so nice to buy a few things. Speaking of no-spend, I had a little spray paint party this weekend to wrap up some things that have been lying around for a while. It was a fun end to the month.
Hope to post pics soon!

Anyway, I did not realize they actually have some decent florals at the Dollar Tree during the Summertime.

I was shocked when I saw these bamboo sticks...

(which I did not buy)

...and these...

(which I also didn't buy! woohoo!)

However, I DID buy these... :)

(I think these are going on our coffee table. I have an idea swirling around in my head already.)

...and these...

(I think these will go on our little kitchen table in the white ceramic vase that I spray painted. Can't wait!)

Also, I got these little cuties...

(I got this stuff for a couple of Fall crafts I may start on soon.)

Then Miss Daisy decided she wanted to be in a pic. :)


Who knew? Can you believe they already have Fall stuff out? Yay! I cannot wait for the cool, crisp Autumn air. I am really looking forward to it more this year than ever. Football season can't come soon enough! It's crazy to think Dad won't be here to enjoy it with us, but hopefully he'll have some pull up there!
ROLL TIDE ROLL!!!

Next on my shopping trip list was grand ole' Wal-Mart, to look at these babies one more time. Oh yeah, and we had other things to get there too. I was really hoping they would be out of stock.
I'm sure Zach was too...but, they weren't.


They had both of the designs, in two different sizes. Dang it. I checked them out for a couple of minutes, then decided I wouldn't buy them. Yep, I said it. I walked out of the store without buying them. See, I DID learn some things from this experience...

...the most important being that I WILL NOT be doing this again next year. :) 

Thursday, July 28, 2011

I Was Featured!!!


I can't believe I just got my first feature! I was checking my blog comments, and saw that I had a new comment posted. I couldn't believe it when I read it- I was featured on Delightful Order's blog. I am so excited!! It makes all my little project work worthwhile to know that others appreciate my ideas!

Check out the link above to see the Features listing. Woohoo! Great day so far! Not to mention, Monday is August 1, so you know what that means...No-Spend July will be no more! I don't know which I'm more excited about right now. It's a toss-up. Can't wait to post next about my shopping escapades on Monday. My entire lunch break will be devoted to hitting local stores. Ha!

Hope everyone is having a good end to the week. I definitely am! :)

Tuesday, July 26, 2011

My First Mod Podge Project


We're coming off of a restful weekend. Our Sunday was pretty much composed of church, popcorn, homemade ice cream and 24 on DVD. Needless to say, it was awesome. (I admit, I have a huge older-man-crush on Kiefer Sutherland. That man can rock a pair of jeans! Hahaha!) Anyhoo, I went on a shopping trip on Saturday. I'm not gonna lie- it was a little painful. I found several cute things (which I knew I would), but came home with nothing. Didn't spend a dime, and that felt great!
Hey, I can always go back in August...which I'm sure I will. :)

Now, for the project...This was my first ever Mod Podge project, and now I'm hooked. I have read countless blog posts about how this is some miracle stuff, and I am now a believer. It is a decoupage that you can use on just about anything, for anything. I have been walking around the house trying to find things to slap this stuff on. Ha! 

You may remember this little $1 number from a thrift store trip (one of the many):


I splurged ($1 also) on some wrapping paper at Dollar General, another frequent stop of mine, and was planning to use it on this project...until I found this at Hob Lob about a month ago...


...and could NOT resist. It was $7.99 (I cringed when I saw the price sticker), but I used my 40% off coupon, so it didn't hurt as bad. Plus, I want to use this on a few more things throughout the house. If you recall, I've already used it on the jewelry tray. I have always wanted a zebra print/black & white room, but until I get that, I am going to settle with throwing in some zebra where I can. Sorry in advance, Zach. :)

I took the new zebra art paper and grabbed up my Mod Podge to transform the organizer. (I've had this Mod Podge for forever now. Keep in mind, all these project supplies were purchased a while back. I'm still sticking to my guns on the no-spending.)

Here are pics of my steps. Got a little camera crazy,
so bear with me...

I used my handy-dandy X-acto knife (first time using one, and no cuts!), and traced the outline of the organizer on the paper.

I made sure the paper cuts fit the curves. It wasn't exact, but it fit. (Do you like my subtle LOFT ad placement here?
Love that store!) :)

I began slapping on the Mod Podge. This stuff is so easy to work with!

After I placed the paper on the Mod Podged organizer, I smoothed out all air bubbles. Then, I let it dry for about an hour. I then put a light coat of Mod Podge on top of the paper to seal it in.

It looks terrible at this stage, I know, but it dries crystal clear! I then repeated these steps on the other side, front, and back of the organizer. It took a little while, just because of the drying time. I also put an additional top coat when it was all said & done, just for good measure.

Now, my favorite- a little Before & After for ya':

BEFORE


AFTER


The organizer is currently being used on my computer desk in the living room. I love how the print adds a little pop to that corner. I may add more of the paper to the inside of the organizer, but I'm thinking it may be too difficult to cut to size. We'll always have paperwork and bills in the slots anyway, so it won't matter.

Love that pic of us too. It's one of my favorites from when we were dating. :)

I have already started another project with the Mod Podge. I had this set of coasters that were purchased about a year ago. The clear coating on top was starting to wear off & it made them look splotchy, so I haven't used them in a while. The idea popped into my head to use Mod Podge to re-coat them, and it worked out perfectly!


 I'm already lining up other projects I can use the Mod Podge with, so be looking for more posts with this awesome stuff!
Related Posts Plugin for WordPress, Blogger...