Showing posts with label Design Projects. Show all posts

Monday, January 19, 2015

Dreaming Tree Designs


Well, it looks as though this blog may be transitioning to more of business blog instead of a personal one, as it has been these 6+ years. I have just recently made the decision to begin selling my many projects that have been steadily accumulating in our spare bedroom. I have been repurposing/crafting for a while now, and I enjoy it so much. It thrills me to know I can now spread a little of that joy to all of you. 

I wasn't really sure how it would all work out when I first hit the "Post" button on Facebook, after I had created my business page.... https://www.facebook.com/dreamingtreeajones... but so far, I am blown away with the response!

I hope to reach many more "Likes" on my page as my little side projects keep coming. The Facebook page has been online for one day now, and the results are already amazing to me! I also hope this will fuel my desire to keep thrifting, crafting, and painting, to make even more "new" things.

This little blog has opened new avenues for me with my projects (and so has Pinterest... a pin I created a couple of years ago has now reached 365 re-pins!!) I am hoping to get back into this blog in the coming months, to show the process of some of my repurposed creations.

Until the next post, I encourage you to visit & "Like" my page, and browse around! Thank you all for supporting me!!

Tuesday, May 21, 2013

Three Ottomans on the Cheap!


I am ready for a break from reality (which means I am so pumped for this long weekend coming up), so I thought I would post on this project that has long been in the works. Truth be told, it has actually been completed for months now- I am just now getting around to posting on it.

Life has just gotten in the way since then. :)

So, I have not-so-recently repurposed three little ottomans that I am so excited to share with you! The only money I have in these are the small amount that I paid for the fabrics & paint for the legs. The most expensive fabric was on this first one...


....and it was only about $20 for a few yards, so I still have extra to use on something else. The ottomans in their "Before" conditions were from my grandmother's house. She actually had three of these things, but I unfortunately don't even have much room for one right now...but I still squeezed it into the house though, rest assured. :)

So, the three ottomans were FREE to me!

This shows two of them in their sad little "Before" state...


I started with an orange ottoman, just like the one pictured above. I knew I did not want the orange in our house (wow), and it was in poor condition anyway, so it had to be transformed.

I headed to Wal-Mart (this was the same trip where I got the leopard fabric for my 30-Minute Vanity Seat Revamp... a LONG time ago). I am in love with this fabric!!

I borrowed my granddad's staple gun, and went to work.

This is yet again another project that I've had ready to go for a while, but waited so long to start on it. And again, I wondered why I waited so long, because it was an easy, quick project. I then waited even longer to post on it, mainly because one of them was a Christmas gift.

I surprised myself because I actually took a lot of step-by-step photos of the process.

Here they are:

I laid the fabric out on the floor so I could work with it better...


I had an adorable little helper while I was in the floor too :) ...


I just cut the fabric to size & lapped it over, securing it with a staple gun at far intervals...


The edges were the only tricky part. I just patiently (ha, yeah right) folded them neatly & tucked, also securing it with a hefty staple from the staple gun.


This shows the two sides stapled...


Now, the ottoman was recovered, but I wasn't done yet. I wanted to really secure the fabric, so I lined each fabric end with hot glue to fully attach it to the underside of the ottoman...


I was proud of the lines I cut in the fabric. Not too bad for the little experience that I have with this...


(I'm telling you, I took a lot of pics of this project...sorry- if you're getting bored, scroll to the bottom for the Before & After) :) ...

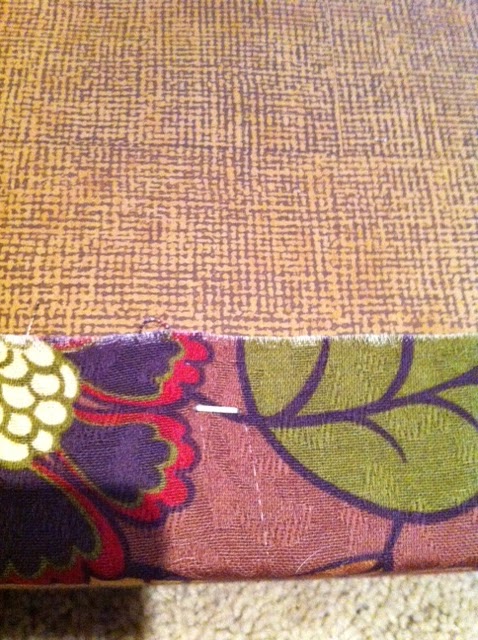
I wanted to show one of the legs, so you could see how dingy the brass was...


I lathered each one up with some Brass-o (great stuff!), and now look...


I thought they needed a little something more. So, I decided to paint a few coats of metallic gold...


That helped to shine them up alot. I must have stopped taking pictures by then, because I didn't have any showing that.

Now, to the Before & After of the first ottoman...

BEFORE

AFTER

Also, here's a peek at the other two I finished. The black & white zebra print went to my mom as one of her Christmas gifts (as I mentioned earlier), and the brown zebra is MINE. :)


It is amazing how just a quick clean-up & a simple fabric change can really transform a piece.

I am toying with the idea of adding nailhead trim to mine, but I haven't made myself try it yet. I have already purchased the nailheads, so we'll see. :)

Friday, February 15, 2013

Monogram Wreath


It's good to be back to posting projects again...

 I toyed with the idea of giving up the blog for Lent, then it was Facebook, but now, I've decided on giving up the radio. I will not listen to the radio in the car. I will use that time to just be in the quiet & have conversations with God. I am in my car alone every weekday- on my way to work, to lunch & back again, then on my way home. Why not use this extra time for that, instead of listening to mindless babble and music??

This is just a quick project that I threw together a few weeks ago. I had seen some ideas on Pinterest (gotta' love Pinterest)...some examples are here, here, and here.

I had to have a replacement for our Christmas greenery wreath, and I thought it was way too early for the Spring wreath. This is more of a transitional look from Winter to Spring, I guess.

My momma got me this gorgeous wooden monogram for Christmas. I had picked it out a while back, and she got it for me. :) I have since discovered that my granddad could actually make these suckers! (I hope to post on some projects soon that he created & I painted. We have 3 "creations" already done, and two waiting to be painted by me! I am loving the partnership we've started, and we hope to eventually sell some of these "creations". It's a fun hobby for us to do in our spare time, and we're really enjoying it so far. If it makes us a little extra spending money,
it would be even more enjoyable!)

I had purchased the base grapevine wreath at the thrift store a while back, and have already used it once in my framed Fall wreath. I love that it's just a bare wreath & you can add anything to it- makes it very versatile!

The deco mesh bow was from one of my dad's funeral arrangements, and I have used it ever since. It decorated our mailbox all during the Fall.


I'm going to enjoy this on the door for a while. I probably won't bust out the flowered Spring wreath until March or so. I will then need to find a home for my wooden monogram. I had thought when I first got it that I would paint it, but I am really loving the natural wood color.

For now, I love the wreath on our front door. To me, you can't go wrong with a cute, classic monogram!

I hope everyone is having a great week & will have a great weekend! I am not looking forward to the cold up ahead, but I'm already planning on spending all day Saturday inside the house, so it won't affect me much. I have some projects I can work on indoors, but I am really itching to get out & work in the basement, painting a piece of furniture that I am super pumped about! It has just been too cold lately to get things done outside or in the basement. That's the only downfall I've found for my little crafting area. Oh well, it gives me something to look forward to for now. :)

Friday, August 17, 2012

Framed Fall Wreath


Is it Fall yet??

I think the older I get, the more I love Fall. It has also been the hottest Summer ever, so that may be why I am longing for cooler weather. I am so excited for not just the cool, crisp air, but also the Fall colors, Fall decor, Fall scents (I just stocked up on my favorite, Sweet Cinnamon Pumpkin candles & soaps, this past weekend!), and- most importantly- football season. :)

We had an eventful, but exciting, week last week. My Zach had Lasik eye surgery last Thursday. He went for his pre-op exam that Tuesday, and they were able to book his surgery for Thursday. He took it! He was a nervous wreck (as I know I would have been even worse), but he made it through like a champ! Not gonna' lie, the night of, it was a little rough. Obviously, the med dosage they gave him was not enough (he's a big guy, you know), so it took him a long time to go to sleep. When he finally did, he slept through the entire night, and awoke the next morning to great eyesight!

He told me that next morning that he could now see better with his own eyes than he did before with his glasses. Praise the Lord!! I am so thankful that he had the opportunity to have the surgery- he has talked about it for years!! He can now look at me with his own big, handsome brown eyes- no glasses or contacts needed anymore. I'm so proud of him for going through with the surgery,
and I'm so glad it was worth it!

Now, enough mushy stuff... :)

...So, I committed a cardinal sin and set out my Autumn decor this week. (Zach just had to get over it.) I know it's August, but I couldn't wait any longer. It saddens me every time I have to pack away my Fall stuff, because it never stays out long enough. (Well, that and the fact that it means Christmas stuff will be replacing it, and it takes me forever to put out all of my Christmas stuff.) Either way, poor little Autumn only gets a couple of months, and then it gives way to Christmas. (And in some households, there isn't a Fall at all- just a big blob of Christmas stuff smack dab
at the beginning of November.)

I did a little Fall-ish project while Zach was away one night, and I'm really happy with it. I just used things I already had around the house too, which makes it even better!

This was what our computer desk area in our living room
looked like before...


I love the Noah's Ark print, but I was wanting a change.

Zach's mom had given us this beautiful frame a while back, and ever since, I have been dying to use it somewhere, so I just placed it here to begin with...and loved it! But of course, it needed a little pop of something else...


I had bought this wreath last week at the thrift store for $4. I mainly wanted it just for the wreath form itself.
It was in perfect condish!


I took all the florals off of the wreath (and like a good thrifter, I'm keeping those for future use). I just attached the wreath
to the frame...


...and the wreath already had a handy hook attached, so it made that part easy...


I had this really pretty red peony wrap that I once used, but it's been housed in the guest room for a while (sadly). I took it, wrapped it around the wreath, and voila!...


I like having a little change in the house, and the pop of red on the bare brown wreath just looks like Fall to me.

As mentioned earlier, I did set out more Fall decor this week. I used a lot of what I had last year around the rest of the house...


I also hung up my dollar store leaf wreaths from last year...


I was in a crafty little mood back then, wasn't I? Never fear- I have some things lined up for this Fall too...thank you, Pinterest.

I also couldn't forget my pumpkins on my thrift store candlesticks, used last year also...


I will post soon a project that's been a few months in the making. Total time on the project really only took up a couple hours, not including paint drying time. I'm excited about it!

Hope you all have a great weekend! I will be doing housework for the most part, and hopefully squeezing in a few more crafts. Our trio is also singing again on Sunday, along with three baptisms,
so I am looking forward to that! God is good!

Wednesday, July 18, 2012

I'm Moving Out!!


Hope I didn't scare anyone! I'm only moving into the basement... not to live, but to craft. Everything is great around here! :)

I'll save those of you who don't want to read all about it, and post my pics first. Keep in mind, this is the first stage of my new hang-out. This is basically a pic of right after the brief clean-up, and after I've moved some of my things downstairs and attempted to organize some of it. I think it's one of those places where I'll need to work in it first to see if any tweaks need to be made, and if anything needs to be moved around. Or, it may be perfect the way it is now...we'll see!

I am loving putting to use this vintage Coca-Cola crate from my grandmother's! It still has all of the compartments, so it keeps all of my paints & supplies separate.


I am also putting to use my little painted chalkboard tray.
This will be a good way to keep my list of projects-in-working-order handy.


To give you an idea of what this area looked like
before I got started...

This pic shows the table with some of my crafting goodies, right after I moved them to the basement...I know- yikes!...


The table, now cleaned off...getting a little better now...


I found this awesome shelf paper at Dollar General. I had to have this cute black & white pattern!


It was so easy to apply, and now I have a cute, covered workspace...


I found the perfect place for my little knob that I scored super cheap at Hob Lob. I plan on using it to hang my ribbons...


Part of my spray paint collection is now in a neat organizer from
the Dollar Tree (Keep in mind- all these items were already purchased. I'm still sticking to No-Spend July)...


I used the few nails & hooks that were already up to hang my wreath forms & tape. My sweetie is going to help me install more soon...


I also used cheap-o baskets from Dollar Tree for more quick organizing. I already had these too!


 These water & juice jars are also from my grandmother's. They will be used for rinsing water when I'm painting...


It is totally crazy to think that my new favorite hang-out is our basement, but it is. I never would have thought to take this place-that-I-never-think-about-and-don't-want-to-think-about and turn it into a place-that-I-want-to-spend-my-time-in-ALL-the-time. And it was all my sweetie's idea- he gets all the credit for this one. I did do a lot of the work in the transformation process, but it never would have happened if he hadn't suggested the basement
as my new crafting "lair".

It is so practical, too. I have been wanting a place to permanently house my crafting accoutrements. For the past year, just since I've really gotten into crafting, I've used our kitchen table for that. Not a very good use of our table, and plus, I miss having a face-to-face meal at home with my sweetie. Not that we don't have a (very nice) heirloom dining room table for that, but we never use that when it's just the two of us. So, it was time to start thinking of
other options.

I had the idea of maybe moving my computer desk from the living room corner to our guest room, and making that my crafting area. Two negatives in that: 1.) we kinda' need the desk in the living room, to fill up the corner that it's in, and 2.) we don't really have the room to squeeze it into our guest room. So, I kept thinking,
but to no avail.

Then, came the day when Zach just casually mentioned in conversation the idea of using a part of the basement. It was one of those moments where the little light bulb must have appeared above our heads. It was a brilliant idea. Yes, brilliant-
I don't use that word often enough.

It is actually very comfortable year-round- not really hot or cold, just an in-between comfortable. Zach also still has to have his area of the basement. He needs it for all of the yard stuff- mower, leaf blower, weed eater, etc. Those things take up a lot of room. And, we also have the shelves (it is SO wonderful to have shelving in our basement) that are occupied by many a plastic bin, filled with things from our childhood bedrooms, Christmas things,
and others.

For the move, I started the organization of the set-up by first carrying my little copper pails down to the basement
with me...


...and it just blossomed from there!

 I then was able to clean out a huge chunk of the guest room floor, piece by piece, by taking things to the basement. Everything else left in the guest room now (besides the furniture!) is yard sale-ready. Woohoo!

I am so happy I was able to revamp this area and make it look not-so-basement-like. There is not much you can do without dipping into a lot of cash, so I'm not too concerned about it just yet. I am just so very excited that I now have a place to unwind, focus on my crafting & creating, and be away from the noise of the house. I know Zach's happy not having to look at all of my paints & brushes & glues, and everything else I have accumulated
over the last year or so.

A few ideas I have for this crafting area swirling around in my head so far include:

- A Pinterest craft checklist hung up
- Several more hooks & knobs hung on the pegboard
- A separate painting area and hot-gluing area- (already working on this one)

I am really hoping that my creativity will flow freely in this new area. Being away from the TV has gotta' help! I carry my iPhone down with me, so I have my music. Now, every time I see something in the house that I could use for a craft, I will go ahead and set it aside to take with me on my next trip to the basement. That way, I can hopefully start dwindling down my collection of knick-knacks above-ground.

A less cluttery home is a happy home. :)

Oh, and speaking of clutter- we now have a clean kitchen table...


...(ahem)... that we still won't use. :)

Thursday, June 21, 2012

Chalkin' It Up


Sorry for yet another cheesy post title. I do that a lot...

Also, I am a little behind in jumping on the chalkboard bandwagon, but I'm so glad I have...

This post shows two little projects (yay- finally, a project!) that were started a LONG time ago, but I wrapped them up this week. (My last project post was my craft organization pails that I posted about here.)

I'm crediting my source for the inspiration of this project to A Diamond In the Stuff's chalkboard trays post and my sweet friend Sheena who created a lot of these for her wedding reception. :)
I have been wanting to create a chalkboard for forever...(the draft of this post was actually started on 8/3/11 when I purchased the first tray that I used, if that tells you anything)! Especially with now seeing all the chalkboards that are being created on
design blogs everywhere.

I have always loved chalkboards. I had one when I was little, and it was one of my most favorite things in my room. I would always pretend to be a teacher, and I really got the good out of that thing. It is sitting in my Mamaw Ruth's basement right now- I guess waiting on my little one to use one day. There is still one hanging up in her kitchen too that I used to play with when I was little.

In creating a chalkboard, all you really need is a flat, usable surface and some chalkboard paint. Easy enough. I have seen countless pictures of old mirrors, old pictures and old paintings that are framed and repurposed as chalkboards. These silver trays are usually a dime a dozen at the thrift store, so I took advantage. I posted this one once before on here, right after I bought it (in August of last year):


This silver tray was 50 cents.

Then, I posted this one that I got at the same thrift store just recently. It was $1:


(I also posted a sneak peek on this one, if you remember from before.)

I almost always pass these up, just because they're usually really rusted or dinged up, and I don't really feel like cleaning them up. But, this is a great way to breathe new life into these. (I told you guys these would one day be a chalkboard, so I kept my word!)
The hardest part about this project??...Finding chalk! Seriously! (Thank you, Hobby Lobby!)

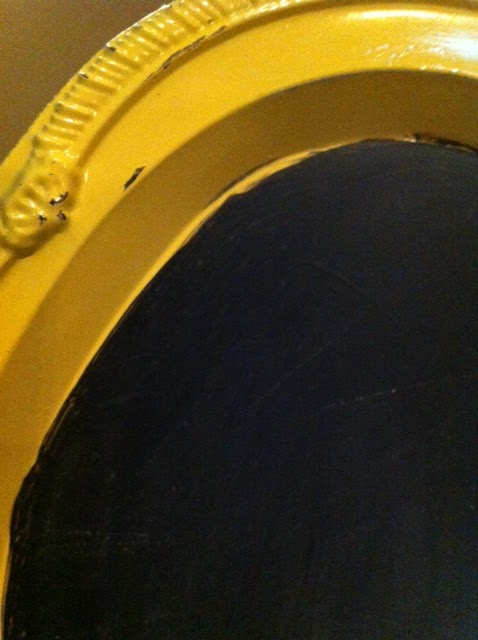
I painted the first one around the frame with a new, funky yellow. I painted it because it was in worse shape than the other, and I wanted a little contrast between the two, if I end up keeping them. The second one, I just cleaned the frame, and left as is in silver.

Chalkboard paint...

Spray painted first tray...

Detail of distressing on first tray...

Chalkin' up the second tray...


After the first coat...

After two more coats...


Conditioning with chalk...

Now, here's the Before & After on both:

First tray...

BEFORE


AFTER


(In the above photo, you can also see my little blue bench that is being finished up. Just have the lettering to go, and I will post the Before & Afters!)


Second tray...

BEFORE


AFTER


Trying out different messages...


I think I have decided to put the first tray to use in my new crafting area- I will hopefully be moving things to the basement TONIGHT!- to use as my craft checklist. The second tray has found a home in our kitchen. :)
Related Posts Plugin for WordPress, Blogger...