Tuesday, July 23, 2013

J & L's Couples' Shower- 7/20/2013


I wanted to share a few photos from Mom & Lynnwood's couples' shindig this past Saturday. We all had such a great time- eating, visiting, and celebrating them & their upcoming marriage. We saw a lot of faces we hadn't seen in a while, both family & friends,
which is always wonderful!

Most of these pics came from my iPhone, and I took them both before & after the shower. We had a sweet friend take photos throughout the shower, so I hope to post those soon. For now, my pictures just look like no guests were there! Ha!

Me & my handsome sweetie

Three generations of Ashley women :)

Mom, Mamaw & Mom's sweetie :)

Mom & her mom

Me & Jon Jon

Me, Mamaw & Jon

Their gift card tree & gift table

Before guests arrived... 

The food tables... 

The three cakes...

The beautiful wreaths at the entrance...

Loved the table decorations. These women did such 
a wonderful job!

Entrance table with lovely photos...

The family picture display...

"The Beautiful Marriage"...

The family table... 

This was one of Mom's favorites. Her best friend from elementary school gave this to her to hang her wedding dress on. So cute!!
 
Registry table...The framed name sign was from me. :)

Beautiful flowers...

 Hope you enjoyed them! I promise we had a room full of guests there, and we have other photos to prove it...
I'll post them soon! :)

Hope you all have a great week! I am loving taking a little break from blogging. I haven't really had a break from crafting though, mainly because we've been working on things for the wedding & reception. I don't want to reveal those creations until the wedding festivities are over, so I'm waiting to post on those projects. Until then, wish us luck as we continue to plan & get everything in order for the big day (exactly one month from tomorrow!!!)

Monday, June 3, 2013

Bookcase Revamp


I bought this little bookcase at the thrift store months ago. I actually hadn't been thrifting in a long time (and haven't much since then either), but I stopped in to get my fix that day. I wasn't planning on buying anything at all (isn't that how it always seems??), but I glanced over to the side & saw this calling to me. We actually did need a bookcase to house some extra books, and I wanted it to go in our guest room. I had plans for a pretty red & cream chevron pattern (which I may still use on another project), but I am so in love with my zebra pattern paper, and it's easier for covering big areas, so here I went with another zebra print project. Just for retrospect, here are some of the many projects where I have used this patterned paper:


So on this project, I started by spray painting the bookcase with Krylon 2-in-1 primer & paint in Cream. Not really thrilled with the finished look of this paint. I have used it on two projects so far, and I didn't like the coverage it provided on either one. I was happier using cheap-y spray paint from Dollar General than this stuff! Who knew?!

I then, of course, lightly distressed it, 
and applied a simple clear coat...


I did the painting in the basement when it was a little warmer, then I got bored in the basement and decided to move it upstairs to the living room to paper it. That's the only downfall of my basement crafting area- it can get really lonely down there by myself.


The trickiest part was matching up the paper roll with the sides of the bookcase, and holding it there while I trimmed the paper...


I papered the edges also, just to give it more color...


...and I also papered the back...


Now, my Before & After!

BEFORE

AFTER

Here it is in our guest room, 
now fully stocked with our overrun of books. 


That's a picture of my dad when he was little. Is he not adorable in that pic? Gah, I love it! :)


It is so nice to now have extra storage in our guest room! I highly recommend repurposing thrift store finds- even cheap-y laminate pieces like this one- for your simple furniture needs throughout your home. You won't have much money or time invested, and you'll have a piece that you uniquely transformed yourself. 
Love it!

Wednesday, May 29, 2013

Memorial Day Weekend '13


We just had a very relaxing, fun, long weekend. It is always easy to forget the reason why you are able to enjoy a day off, but that's something you cannot overlook. I am so thankful for the ones who have fought & sacrificed so that we can enjoy our freedoms.

We were very blessed to have absolutely beautiful weather the entire weekend!! I did get a lot of work done inside the house, but I mainly left that for when it was dark outside. I got a nice little sun tan burn, laying out on our deck two of the afternoons.

My sweetie & I went to church on Sunday morning, then he went to play golf. He was sweet enough to invite me to go ride around in the cart with him. :)


On one of the afternoons, I went out to the back deck to clean our patio furniture. I usually just use the water hose & a Magic Eraser to do this, and it works like a charm. The only problem is that when I start to unravel the water hose, two little babies come running toward me, wanting to play. :)

I am more than happy to oblige. After a few minutes of playing, with just a few intervals of cleaning mixed in, they were both soaked & loving it.


I have been taking advantage of the gorgeous weather lately, not just over the long weekend, but on afternoons when I get home from work too. Daisy girl & I have been jogging around our neighborhood. I am loving it, because we both get exercise, and we have great company while doing it.


(I am resolved to the fact that she will not look at the camera.)


She LOVES rolling in the grass. Zach's favorite is when she picks a high spot in our backyard & rolls all the way down the hill.
Silly girl.


She was also my little buddy while I was laying out on our deck. She loves sunbathing as much as her momma, unfortunately.


On a more serious note, just wanted to write a little update on real life, mainly for my own benefit. I don't like to post on really personal things on the blog, because I want it to be a "happy" place for me. But, life isn't all about happiness, so I have to include a little shot of reality when necessary.

My grandfather just recently found out that he has a small cancerous area on his bladder. We praise the Lord that it was caught very early. Treatment options have been discussed, and they will proceed with those in a few weeks. I ask for your prayers for him as he deals with this, and for my grandmother & mom, along with our whole family, as we support him through this. He is one of the few men left in my life, and I love that man dearly.

Speaking of the wonderful men in my life, please also pray for my father-in-law. He is now scheduled to have a kidney transplant in a few weeks. His sister, our Aunt Gail, has selflessly agreed to donate a kidney- she was a perfect match- and we will be forever grateful to her for that. Please pray for both of them as they endure these surgeries, and the following weeks as they adjust to life after.

We are so thankful that things have fallen into place the way they have! There will always be negative things coming your way, but you can almost always still see the light at the end of the tunnel. We know that God is good, and He knows best. 

Tuesday, May 21, 2013

Three Ottomans on the Cheap!


I am ready for a break from reality (which means I am so pumped for this long weekend coming up), so I thought I would post on this project that has long been in the works. Truth be told, it has actually been completed for months now- I am just now getting around to posting on it.

Life has just gotten in the way since then. :)

So, I have not-so-recently repurposed three little ottomans that I am so excited to share with you! The only money I have in these are the small amount that I paid for the fabrics & paint for the legs. The most expensive fabric was on this first one...


....and it was only about $20 for a few yards, so I still have extra to use on something else. The ottomans in their "Before" conditions were from my grandmother's house. She actually had three of these things, but I unfortunately don't even have much room for one right now...but I still squeezed it into the house though, rest assured. :)

So, the three ottomans were FREE to me!

This shows two of them in their sad little "Before" state...


I started with an orange ottoman, just like the one pictured above. I knew I did not want the orange in our house (wow), and it was in poor condition anyway, so it had to be transformed.

I headed to Wal-Mart (this was the same trip where I got the leopard fabric for my 30-Minute Vanity Seat Revamp... a LONG time ago). I am in love with this fabric!!

I borrowed my granddad's staple gun, and went to work.

This is yet again another project that I've had ready to go for a while, but waited so long to start on it. And again, I wondered why I waited so long, because it was an easy, quick project. I then waited even longer to post on it, mainly because one of them was a Christmas gift.

I surprised myself because I actually took a lot of step-by-step photos of the process.

Here they are:

I laid the fabric out on the floor so I could work with it better...


I had an adorable little helper while I was in the floor too :) ...


I just cut the fabric to size & lapped it over, securing it with a staple gun at far intervals...


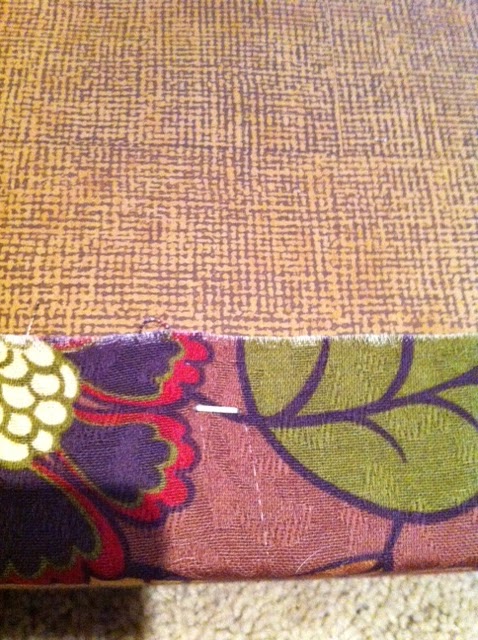
The edges were the only tricky part. I just patiently (ha, yeah right) folded them neatly & tucked, also securing it with a hefty staple from the staple gun.


This shows the two sides stapled...


Now, the ottoman was recovered, but I wasn't done yet. I wanted to really secure the fabric, so I lined each fabric end with hot glue to fully attach it to the underside of the ottoman...


I was proud of the lines I cut in the fabric. Not too bad for the little experience that I have with this...


(I'm telling you, I took a lot of pics of this project...sorry- if you're getting bored, scroll to the bottom for the Before & After) :) ...

I wanted to show one of the legs, so you could see how dingy the brass was...


I lathered each one up with some Brass-o (great stuff!), and now look...


I thought they needed a little something more. So, I decided to paint a few coats of metallic gold...


That helped to shine them up alot. I must have stopped taking pictures by then, because I didn't have any showing that.

Now, to the Before & After of the first ottoman...

BEFORE

AFTER

Also, here's a peek at the other two I finished. The black & white zebra print went to my mom as one of her Christmas gifts (as I mentioned earlier), and the brown zebra is MINE. :)


It is amazing how just a quick clean-up & a simple fabric change can really transform a piece.

I am toying with the idea of adding nailhead trim to mine, but I haven't made myself try it yet. I have already purchased the nailheads, so we'll see. :)
Related Posts Plugin for WordPress, Blogger...