Monday, March 26, 2012

Zach's 28th Birthday Week!


Yep, birthday week. My sweetie's 28th birthday was this past Tuesday, but I think we've been celebrating for an entire week- from last Saturday to this past Saturday.

Last Saturday, Zach's dad took us out to eat at Zach's choice- Outback. (I was happy with that.) We had a great meal & enjoyed spending time with his dad & Grandma.

On Monday night, my family cooked dinner for Zach's birthday. It was his request- fried chicken fingers and mac & cheese were a must. We enjoyed spending time laughing with my family.

On Tuesday, his actual b-day, I told him I would take him wherever he wanted to go for lunch and/or dinner. He picked Chow King (ha!), the new buffet in our little town. We were are still excited about it. It was yummy, and bonus, they have sushi. I was brave & tried a good bit of it, and it was (surprisingly) fresh. So excited that I don't have to go very far when I get a sushi craving.

Zach's only request for the day was to play golf. So, that afternoon after I got home from work, we changed clothes & hit the course. It was so much fun! I rode around in the golf cart while he played only 9 holes. We are definitely going to make this a routine, especially now that the weather is perfect for it.
I took a cute pic of us in the cart...


And I snapped a few shots of him playing...


So cute! :)

Since we were still stuffed from lunch, we decided to do something "small" for dinner, so went to WingStop.

On Saturday, we went to see his family. We shopped that morning, then had a yummy dinner at his mom's with her & Zach's sister's fam. They have two little girls, so it's always a fun time. It's always great spending time with family.
There's not much better than that.

I hope he had a wonderful week, because he deserves it & so much more. I am so thankful to be able to spend another birthday
with my sweetie!

Tuesday, March 20, 2012

Liebster Blog Award!!


I am thrilled to post that I have been awarded the...


Award!

Thanks so much to the four sisters at Bringing Beauty (that awesome post of theirs is here) for choosing my little blog as one of their 5 recipients for this award!

My winners for this award that I am so happy to pass on
are as follows...

Micki @ ADD Housewife-  http://www.addhousewife.com/ -
She has an awesome site filled with great ideas. (She even recently posted where she tried one of my own recipes- Chicken Artichoke Heart Fettucine Alfredo.) Check it out!

Debi @ Projects on the Farm- http://projectsonthefarm.blogspot.com/ - She loves painting, furniture redos, etc. Don't we all? She also is a great encourager with her comments! :) You'll love her writing!

Evelyn @ My Turn (For Us)- http://myturn-evelyn.blogspot.com/ - Her & her hubby's goal is to travel the world in an RV. Sounds great to me!! You'll love her blog!

Ash the Bash @ Made in Morningside- http://madeinmorningside.blogspot.com/ - Ash (love the name, ha!) shares an updated to-do list of improvements on her & her boyfriend's flat- you go girl!) The Before & After photos are awesome under the "Take A Look Around" tab. Check it out!

Karen @ Bargain-ista- http://bargain-ista.com/ - She's one of my newest followers, and you'll love her bargain-hunting blog.
She went an entire year without buying new clothes. Wow!


Congratulations to all 5 of you lovelies! Now it's your turn to pass the award on!

Here are the rules for passing it along:

-Choose 5 up and coming blogs to award with less than
200 followers.
-Show your appreciation to the blogger who awarded you by linking back to them.
-Post the award on your blog.
-Link back to the blogs you are awarding so that everyone else can pay them a visit.

Thanks again, Bringing Beauty ladies for choosing my little blog, and congrats to my awesome winners!

Also, Happy 28th Birthday to my sweetie today!! What an awesome day it's been already! :)

Wednesday, March 14, 2012

Twine-Wrapped Bottle


This is such a super easy craft! The idea came from this post from a blog I frequent, The Kurtz Corner. I have seen many projects that take a simple, un-used item & wrap or cover it with twine. It totally transforms the object, and it's so quick & easy to do. I've also seen some great posts about painting a glass bottle,
which may be something I try in the future.
You can use any kind of bottle or jar for this transformation-
just make sure it is clean.

All you need for this craft:
- bottle of any kind, size
- twine
- hot glue gun
- scissors


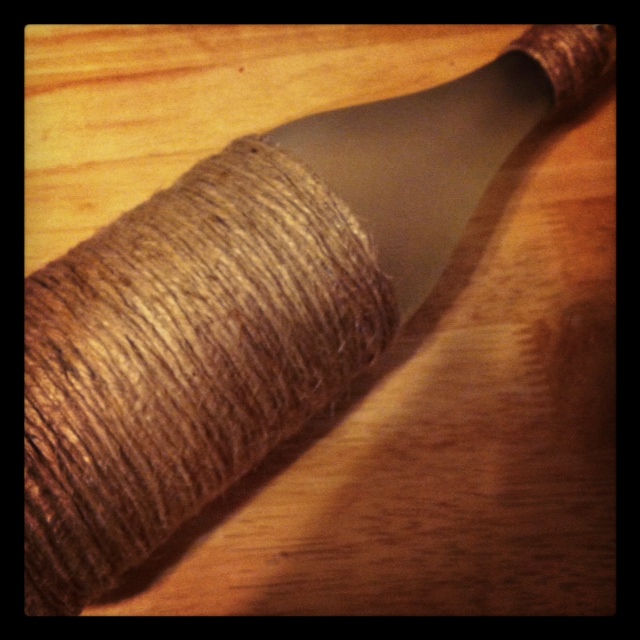
I just carefully wrapped the twine around, starting at the bottom of the bottle, working my way up. I put just a few drops of hot glue along the way. So easy! Make sure not to put too much hot glue!


This next pic shows it after the first wrap-around. I decided I needed the twine a little thicker, so I quickly wrapped a second layer, making sure the bare spots were covered.
This went a lot faster than the first round.


The bottle I used had tempered glass almost up to the top. I decided to do something different, so instead of wrapping the bottle continually up to the top, I broke it up and left some of the tempered glass exposed. I liked it a lot with some of that
pretty glass showing.


Finished product...


And here it is in its new home on top of our entertainment center...


I'm loving these cheap, quick projects!

Monday, March 12, 2012

Ballard Designs Knock-Offs- 1st Installment


Some of these ideas came to me forever ago, and I have had the supplies for a few of these projects for a while. I must have been in another funk, because I never got around to starting and/or completing them, until now. I am still determined to get more involved in my blog this year. I'm staying busy with it & creating more & more projects, and I love it!

So, months ago, I got my new Ballard Designs catalog in the mail. I caught myself thinking something while perusing. I looked at so many of the decor items and thought, "I could make that!" Design blogs must be rubbing off on me, which is a good thing. Before reading the blogs like I do, I would have looked through the mag, thought, "I can't spend that much money on useless stuff," and throw it out. Now, I decided I would try myself and create a few "knock-offs" to see if I really could do it. I've seen many other bloggers do the same thing, and it always turns out beautifully.

I plan on posting a series of these, because once I got into it, I realized just how many items I could recreate at a much cheaper price. All of my supplies for these projects were purchased long ago (they were the ones I mentioned have been taking up space in the guest room). So far, I have four different projects going! Here's the first, and the others will (hopefully soon) follow:


Example 1:

Their Version: Laundry Letters- $45


My Version: Laundry Letters- My Price- $10.18

They also have this in white, which I loved more than the black. I went to Hobby Lobby & bought the seven letters, which were $0.99 each ($6.93 total). (I had a 40% coupon, but that was used for a larger item, which I'll post on soon!) I already had flat white spray paint left over, and I had the wooden slab left over from another project. It was purchased at Michael's a long time ago, but it was next-to-nothing.

I just lined up the letters on paper in the driveway, sprayed away (just two coats), and they were done! Then, after waiting for them to dry, I lined them up on the wooden slab, and hot glued them down. Just because I love this part of the project, I roughly added up what was spent on my version of the Laundry Letters:

- 7 letters @ $0.99 each =                      $6.93
- 2 small wooden slabs @ $1.00 ea =  $2.00 (and I'm being generous here)
- 1 can flat white spray paint =                $1.25 (cheap-o- purchased from Dollar General)
Grand Total =                                      $10.18

This calculation should be pretty close. Pretty awesome when the most expensive single item was the spray paint! And here she is, with photos of steps:

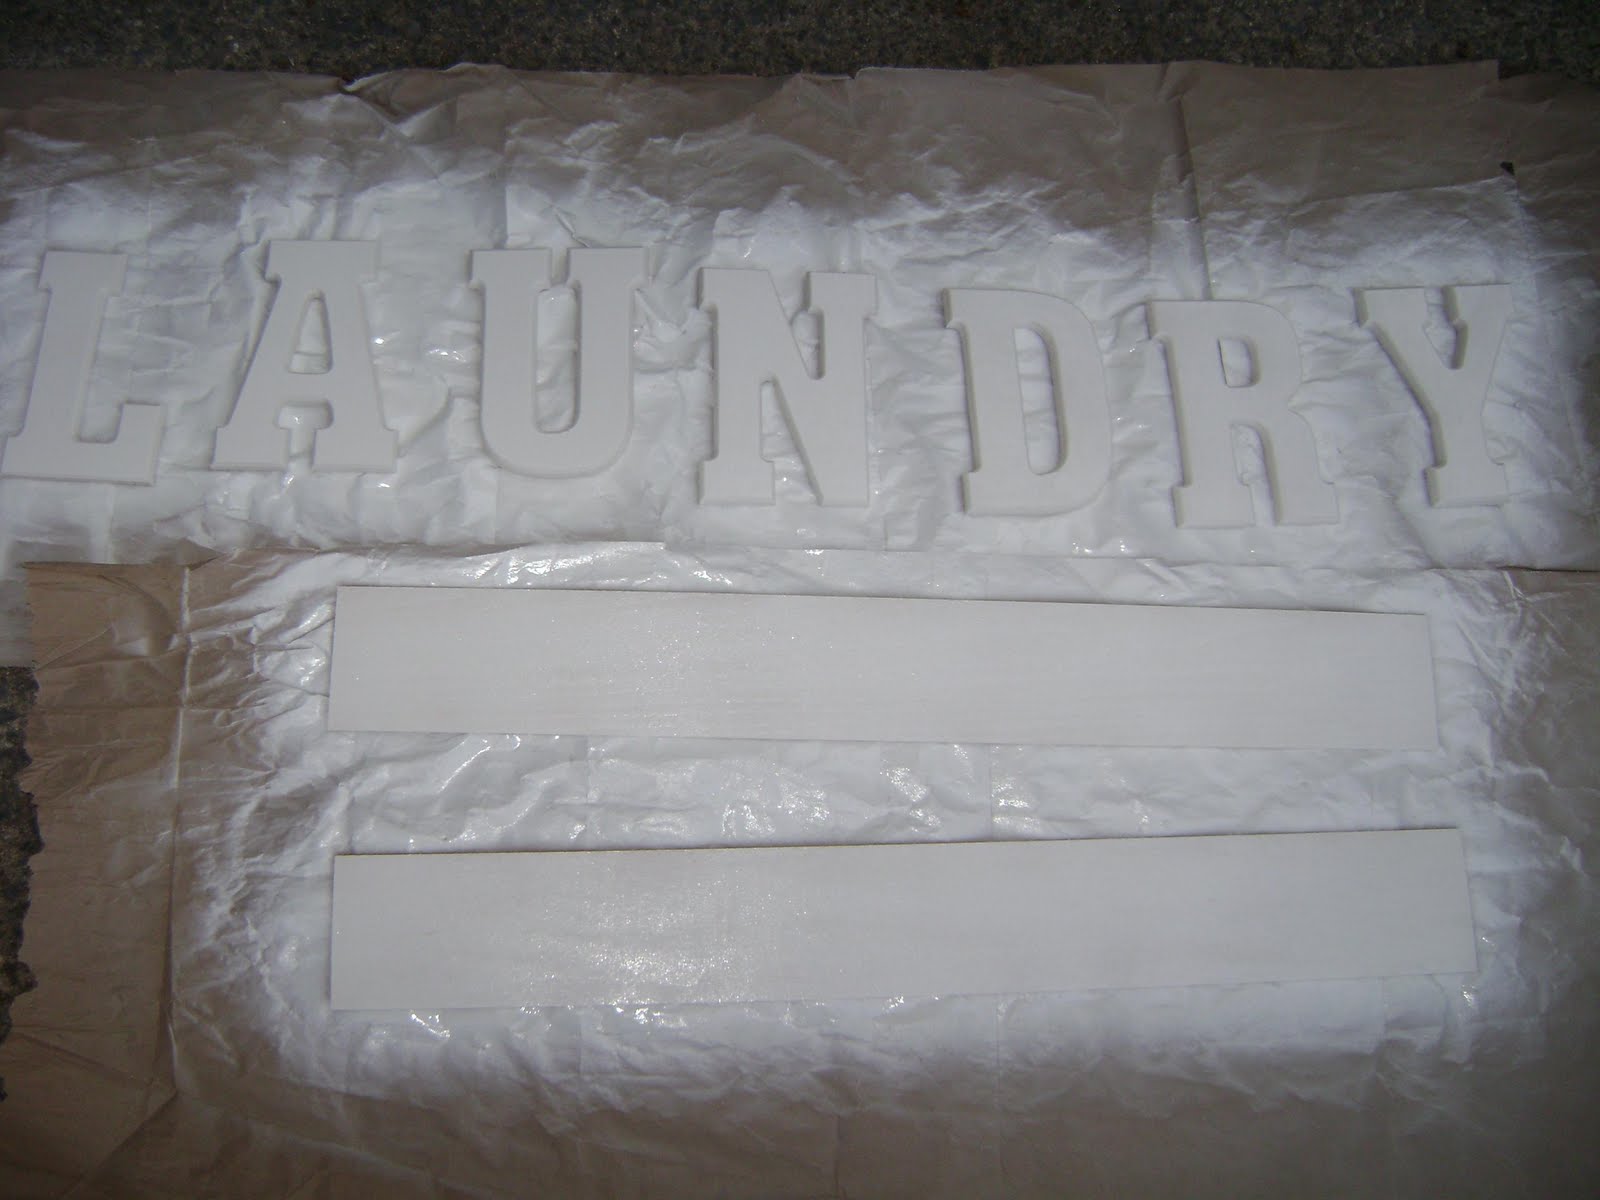
Here are the letters and slabs all laid out & ready to be painted:


This is after one coat of white spray paint:


This is after just two coats. I stopped at that:


I then waited a day or so for the pieces to completely dry. Then, sanded them down to smoothe the surface. I then lined them up, put plenty of hot glue on the bottoms of the letters and set them on the board. Easy! I may add a little paint on the edges later on. The Ballard Designs version has a brushed gold around the edges. Looks pretty! 


Now for the final pic. Drum roll, please :) ...

THEIRS (just picture it in white)


MINE


Final price difference: Theirs: $45; Mine: $10.18

$34.82 SAVED!!!

Love it! (To add to the excitement, I read the reviews on the BD website, and half of the reviewers said the letters would not stay up straight- some had to glue theirs back! Yay! Makes me feel even better about opting to make my own.
It really adds to our laundry room. 

Thursday, March 8, 2012

One of the Best Recipes Ever!


This is one of the best recipes I've tried in a while.

It's also a recipe for the longest named dish ever.
Chicken & Artichoke Heart Fettuccine Alfredo. :)

I found this recipe here, after searching much of the internet for the perfect one. I'm the type that will look over a recipe, and if it's more than, say, 5-7 ingredients, I pass it up. I'm lazy. I also pass over most recipes that call for anything fancy. If I don't know the name of an ingredient, it won't be cooked in my house.
It's that simple.

This was a simple, few ingredient, quick recipe. It actually took even less time than the recipe called for.
It was crazy how quickly it was ready.

Here's the recipe (with my little notes included in purple)...


-Pasta-
- 1 lb fettuccine pasta (I could only find linguine in a 16 oz. bag, so that's what I used)
- 1 26 oz. jar Alfredo sauce (or make your own- which I did- recipe is further down)
- 1 jar marinated artichoke hearts, chopped roughly (I used about 3/4 of a can)
- 3 boneless skinless chicken breasts (I used leftover rotisserie chicken, just enough for the two of us)
- Mozzarella, Asiago or Parmesan cheese (I bought Asiago specifically for this recipe, but realized I had Mozzarella already when I got home. I think the Asiago was better, though.)


-Alfredo Sauce-
- 1 cup Half & Half
- 1/2 cup ( 8 tbsp.) butter
- 1/2 cup Asiago cheese

  • - 1/2 cup Parmesan cheese


    -Directions-
    Cook chicken & cut up. (In my case, I just had the leftover rotisserie chicken on hand.) Prepare noodles according to packaging. Halfway drain artichoke hearts. Prepare Alfredo sauce, or heat up jar. (If you used the jarred sauced, after heating, skip down to *.)


    -To Prepare Alfredo Sauce-
    Melt butter & pour in Half & Half. Bring to a simmer, keep heat low & stir in the cheeses. Simmer until smooth.


    *After Alfredo sauce is heated & ready, add the cooked chicken & artichokes. After it is heated through, pour over noodles. Garnish with more cheese.


    Here are some lovely pics to illustrate the process...

    Ingredients- minus the Parmesan


    Cooking the butter & pasta simultaneously


    The butter & Half & Half cooking


    Adding the Parmesan cheese


  • Adding the Asiago cheese

    Cooking it all together

    Noodles cooking

    Mixing the chicken into the sauce 

    Mixing the artichokes in

    Stirring it all together 

    The finished product

    This was DELICIOUS! Let me know if you try it!

    Tuesday, March 6, 2012

    Simplifying my Real Simples


    Thanks for the comments that I received both here & on FB about my little record table. Taking those into consideration, I am keeping it as is for now. I may get the itch to paint it at some point, but not for now.

    So, do you remember how difficult it was to keep your room clean when you lived at home with mom & dad? (It was for me, anyway). Well, when you're married (as most of you few that read this thing are), instead of just having your own mess to clean up in your bedroom, you have your spouse's too.
    And let's be honest, most guys aren't concerned with
    keeping a room tidy. So, in other words, I find myself straightening up our bedroom a lot.

    This idea came to me one of those many times.

    I have had this little magazine rack for a while now- I think it was purchased at a Home Goods. (I'm hoping you can make out what it looks like, underneath all the magazines piled on it.)


    It was once in our living room, then we got a nicer one to replace it, so this one went in our room. I use it for my Real Simple magazines. If you don't subscribe to this mag, you should! It has the neatest organizational ideas as well as yummy, easy recipes. Also, it doesn't seem to have as many ads as most women's
    magazines do either.

    I was almost, almost going to chunk every one of these magazines in the garbage (the rack was completely full, as you can see by the pic), but I couldn't bring myself to do it. Then, it occurred to me that even though there are some things in these that I would love to keep, I didn't have to keep the entire issues. 

    So, it took me about a few nights, all while watching the tube, but I got this project done. I sat in the floor with my
    scissors & pen...


    ...and my Daisy girl keeping me company, and cut out only the pages and/or sections that I wanted to keep. I made temporary labels for "Recipes", "Organization", "Inspiration", "Good To Know" & "Decor Ideas", and started filing.


    I ended up keeping a lot of recipes and a lot of organizing tips...

    ...and sentimental things...


    ...but the bulk of the magazines were filled with useless pages that were thrown away.

    Talk about making some space! Now I have most of the magazine rack left for new issues!

    I gathered all of my categorized loose pages, a 3-ring binder, a pack of dividers, and started punching holes. These are some pics of the steps & what I ended up with...

    My binder & dividers...and a snout & paw belonging to my little helper in the top right corner. :)

     I found TONS of yummy recipes! I need to keep this binder handy!

    To jazz it up a little, I cut the edges of the pages with my zig-zag scissors.

    All organized...

    So, my favorite part- the Before & After...

    BEFORE


    AFTER

    Monday, March 5, 2012

    To Paint Or Not To Paint...


    ...that is the question.

    I am so excited to have bought this little record shelf at an estate sale this Friday. Me & my sweetie went on my lunch, which was such a nice break from the day. The shelf was only 8 bucks! I just couldn't pass up 8 bucks. It's really light, but it has three spacious shelves- great for my ever-growing picture frame collection. 


    I don't have a clue where to put this thing in my house, but I am loving it anyway. Any place for more storage/display is awesome in my book. 

    The only problem- do I paint or leave as is??

    I would LOVE some input on this. I'm going back & forth about it. Me & Zach both like the color of the wood, so we may just keep it that way. I tossed some things on it just to see what it would look like, and I do like it. I can't decide.


    It would be the perfect piece to practice more of my painting skills, since it has no sentimental value. But, if I do paint it, what color? The options are endless I guess.

    Let me know what you think!

    Hope you all had a great weekend! We're entering a big birthday month in my family- my brother's is tomorrow, my mom's is this Saturday, and my sweetie's is the 20th. We are celebrating tonight with a family dinner at home- grilling steaks- then we're heading to B'ham Saturday. More sushi & shopping- sounds like a plan to me!
    Related Posts Plugin for WordPress, Blogger...