Showing posts with label Being Thrifty. Show all posts

Monday, January 19, 2015

Dreaming Tree Designs


Well, it looks as though this blog may be transitioning to more of business blog instead of a personal one, as it has been these 6+ years. I have just recently made the decision to begin selling my many projects that have been steadily accumulating in our spare bedroom. I have been repurposing/crafting for a while now, and I enjoy it so much. It thrills me to know I can now spread a little of that joy to all of you. 

I wasn't really sure how it would all work out when I first hit the "Post" button on Facebook, after I had created my business page.... https://www.facebook.com/dreamingtreeajones... but so far, I am blown away with the response!

I hope to reach many more "Likes" on my page as my little side projects keep coming. The Facebook page has been online for one day now, and the results are already amazing to me! I also hope this will fuel my desire to keep thrifting, crafting, and painting, to make even more "new" things.

This little blog has opened new avenues for me with my projects (and so has Pinterest... a pin I created a couple of years ago has now reached 365 re-pins!!) I am hoping to get back into this blog in the coming months, to show the process of some of my repurposed creations.

Until the next post, I encourage you to visit & "Like" my page, and browse around! Thank you all for supporting me!!

Monday, June 3, 2013

Bookcase Revamp


I bought this little bookcase at the thrift store months ago. I actually hadn't been thrifting in a long time (and haven't much since then either), but I stopped in to get my fix that day. I wasn't planning on buying anything at all (isn't that how it always seems??), but I glanced over to the side & saw this calling to me. We actually did need a bookcase to house some extra books, and I wanted it to go in our guest room. I had plans for a pretty red & cream chevron pattern (which I may still use on another project), but I am so in love with my zebra pattern paper, and it's easier for covering big areas, so here I went with another zebra print project. Just for retrospect, here are some of the many projects where I have used this patterned paper:


So on this project, I started by spray painting the bookcase with Krylon 2-in-1 primer & paint in Cream. Not really thrilled with the finished look of this paint. I have used it on two projects so far, and I didn't like the coverage it provided on either one. I was happier using cheap-y spray paint from Dollar General than this stuff! Who knew?!

I then, of course, lightly distressed it, 
and applied a simple clear coat...


I did the painting in the basement when it was a little warmer, then I got bored in the basement and decided to move it upstairs to the living room to paper it. That's the only downfall of my basement crafting area- it can get really lonely down there by myself.


The trickiest part was matching up the paper roll with the sides of the bookcase, and holding it there while I trimmed the paper...


I papered the edges also, just to give it more color...


...and I also papered the back...


Now, my Before & After!

BEFORE

AFTER

Here it is in our guest room, 
now fully stocked with our overrun of books. 


That's a picture of my dad when he was little. Is he not adorable in that pic? Gah, I love it! :)


It is so nice to now have extra storage in our guest room! I highly recommend repurposing thrift store finds- even cheap-y laminate pieces like this one- for your simple furniture needs throughout your home. You won't have much money or time invested, and you'll have a piece that you uniquely transformed yourself. 
Love it!

Tuesday, May 21, 2013

Three Ottomans on the Cheap!


I am ready for a break from reality (which means I am so pumped for this long weekend coming up), so I thought I would post on this project that has long been in the works. Truth be told, it has actually been completed for months now- I am just now getting around to posting on it.

Life has just gotten in the way since then. :)

So, I have not-so-recently repurposed three little ottomans that I am so excited to share with you! The only money I have in these are the small amount that I paid for the fabrics & paint for the legs. The most expensive fabric was on this first one...


....and it was only about $20 for a few yards, so I still have extra to use on something else. The ottomans in their "Before" conditions were from my grandmother's house. She actually had three of these things, but I unfortunately don't even have much room for one right now...but I still squeezed it into the house though, rest assured. :)

So, the three ottomans were FREE to me!

This shows two of them in their sad little "Before" state...


I started with an orange ottoman, just like the one pictured above. I knew I did not want the orange in our house (wow), and it was in poor condition anyway, so it had to be transformed.

I headed to Wal-Mart (this was the same trip where I got the leopard fabric for my 30-Minute Vanity Seat Revamp... a LONG time ago). I am in love with this fabric!!

I borrowed my granddad's staple gun, and went to work.

This is yet again another project that I've had ready to go for a while, but waited so long to start on it. And again, I wondered why I waited so long, because it was an easy, quick project. I then waited even longer to post on it, mainly because one of them was a Christmas gift.

I surprised myself because I actually took a lot of step-by-step photos of the process.

Here they are:

I laid the fabric out on the floor so I could work with it better...


I had an adorable little helper while I was in the floor too :) ...


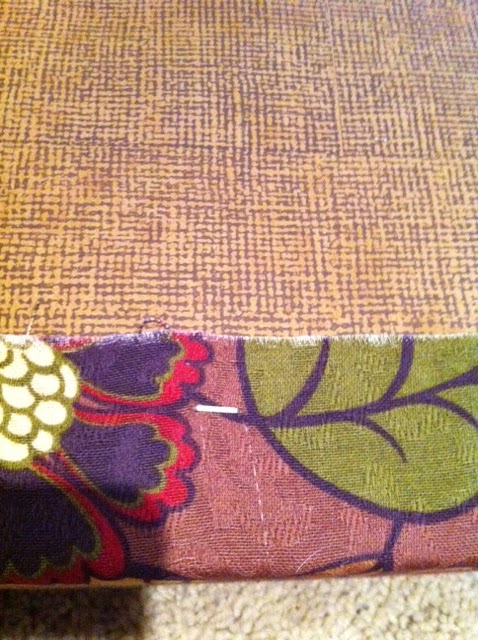
I just cut the fabric to size & lapped it over, securing it with a staple gun at far intervals...


The edges were the only tricky part. I just patiently (ha, yeah right) folded them neatly & tucked, also securing it with a hefty staple from the staple gun.


This shows the two sides stapled...


Now, the ottoman was recovered, but I wasn't done yet. I wanted to really secure the fabric, so I lined each fabric end with hot glue to fully attach it to the underside of the ottoman...


I was proud of the lines I cut in the fabric. Not too bad for the little experience that I have with this...


(I'm telling you, I took a lot of pics of this project...sorry- if you're getting bored, scroll to the bottom for the Before & After) :) ...

I wanted to show one of the legs, so you could see how dingy the brass was...


I lathered each one up with some Brass-o (great stuff!), and now look...


I thought they needed a little something more. So, I decided to paint a few coats of metallic gold...


That helped to shine them up alot. I must have stopped taking pictures by then, because I didn't have any showing that.

Now, to the Before & After of the first ottoman...

BEFORE

AFTER

Also, here's a peek at the other two I finished. The black & white zebra print went to my mom as one of her Christmas gifts (as I mentioned earlier), and the brown zebra is MINE. :)


It is amazing how just a quick clean-up & a simple fabric change can really transform a piece.

I am toying with the idea of adding nailhead trim to mine, but I haven't made myself try it yet. I have already purchased the nailheads, so we'll see. :)

Thursday, February 21, 2013

Plant Stand Makeover


I scored this little plant stand months ago, thanks to a friend. She was part of a local consignment/thrift sale, and she gave me one of her tickets. The tickets were for the consignors to come to the sale one day early & look around. I was so excited to go!! I found a lot of little things, perfect for repurposing, but in the end, I took only this little beauty home with me...

(Please excuse our lovely basement backdrop.)

It was only 6 bucks too!

I took it straight to the basement & sanded it well all over. I then began by flipping it over to spray paint the underside first...


Easy enough!...


After the two coats on the underside were dry, I flipped it over & painted three coats all over.


Then came the fun part- distressing!! I wanted the finish on this one to be similar to the one on my first furniture painting project, my side table. Both pieces looked pretty with the smooth, glossy white finish, but I am just really into the aged, distressed look lately. And the beauty of it is that I can always change it up later IF I ever get tired of it.


I tried to zoom in on the detail...


You can't really mess up sand paper distressing. I always like to start easily and make a small spot, then if I want it bigger, I can always sand more heavily.

I thought I would immediately put this baby into the yard sale pile in the guest room, but I actually needed to use it, atleast for a little while. I have just three plants left from when my dad passed away. One is thriving & looks beautiful in our living room. The other two are slowly fading, so I need somewhere to house them for the time being. This was the perfect place for one of them...


The lighting is bad in the last photo, because it was a pretty, sunny day & I had the blinds open. So thankful for the sunshine we've had for a few days lately.

So, a quick Before & After!...

BEFORE


AFTER


Isn't it crazy what a little spray paint & sand paper can do??

Hope you all have a great weekend! I can't believe how fast the weekends are rolling around lately. The weeks have been so busy, so they come & go really quickly. Recently, we seem to have things going almost every weeknight too, so that helps. Two nights ago, I went with mom & some friends to see Safe Haven. WOW. Such a great movie! I was skeptical going in to another (cheesy) Nicholas Sparks movie, because he really disappointed me with The Vow, but this one really got me. And if you've lost a parent, it will get to you even more.

I have some really exciting plans coming up, so that makes the quick passing of time more exciting too. I am going to the Elton John concert in Chattanooga in March (which will be here before we know it- yay!!), and my sweetie & I are going with his dad to the Crimson Caravan in May!! I was so excited that we were able to get tickets to that! I am also really shocked that it will be here in our little town, but it is! Woohoo!! I have never heard Nick Saban speak in person (Zach & his dad have), so I am super pumped!

Roll Tide!!

Friday, February 15, 2013

Monogram Wreath


It's good to be back to posting projects again...

 I toyed with the idea of giving up the blog for Lent, then it was Facebook, but now, I've decided on giving up the radio. I will not listen to the radio in the car. I will use that time to just be in the quiet & have conversations with God. I am in my car alone every weekday- on my way to work, to lunch & back again, then on my way home. Why not use this extra time for that, instead of listening to mindless babble and music??

This is just a quick project that I threw together a few weeks ago. I had seen some ideas on Pinterest (gotta' love Pinterest)...some examples are here, here, and here.

I had to have a replacement for our Christmas greenery wreath, and I thought it was way too early for the Spring wreath. This is more of a transitional look from Winter to Spring, I guess.

My momma got me this gorgeous wooden monogram for Christmas. I had picked it out a while back, and she got it for me. :) I have since discovered that my granddad could actually make these suckers! (I hope to post on some projects soon that he created & I painted. We have 3 "creations" already done, and two waiting to be painted by me! I am loving the partnership we've started, and we hope to eventually sell some of these "creations". It's a fun hobby for us to do in our spare time, and we're really enjoying it so far. If it makes us a little extra spending money,
it would be even more enjoyable!)

I had purchased the base grapevine wreath at the thrift store a while back, and have already used it once in my framed Fall wreath. I love that it's just a bare wreath & you can add anything to it- makes it very versatile!

The deco mesh bow was from one of my dad's funeral arrangements, and I have used it ever since. It decorated our mailbox all during the Fall.


I'm going to enjoy this on the door for a while. I probably won't bust out the flowered Spring wreath until March or so. I will then need to find a home for my wooden monogram. I had thought when I first got it that I would paint it, but I am really loving the natural wood color.

For now, I love the wreath on our front door. To me, you can't go wrong with a cute, classic monogram!

I hope everyone is having a great week & will have a great weekend! I am not looking forward to the cold up ahead, but I'm already planning on spending all day Saturday inside the house, so it won't affect me much. I have some projects I can work on indoors, but I am really itching to get out & work in the basement, painting a piece of furniture that I am super pumped about! It has just been too cold lately to get things done outside or in the basement. That's the only downfall I've found for my little crafting area. Oh well, it gives me something to look forward to for now. :)

Friday, November 16, 2012

Chalkboard Minis


I'm very excited to share this quick little project with you. This only took me a few hours to complete, not including drying times in between. The idea for this project all started when I found these tiny little silver trays at the thrift store about a month ago...


They only had four, so I got them all. 25 cents a piece. :)

I had repurposed a larger version of these in this post months ago, and I've used the chalkboard paint at other times, like in my mailbox revamp. So, this would be something different. Basically, just a smaller version of my larger chalkboard tray.

I painted each one with two coats of spray paint, all different colors. I just used simple spray paints that I already had-
yellow, red, white & gold.


I then sand-papered each surface to distress the edges & smoothe out the middles to prep for chalkboard paint. I think I painted about 3 coats of the chalkboard paint on each, and they were done! Not much money invested at all, and not much time either.
Love these kinds of projects!

Some pics of the finished chalkboard minis...


So, a Before & After, because who doesn't love a good
Before & After shot?...

BEFORE

AFTER

I (think I) am planning on selling these little cuties. My family is planning a big estate & yard sale, slated for this next Spring, and I may debut some of my creations there to sell. Who knows if that will work out or not? I just feel like I'm creating all of these little projects, then they have nowhere to go. I am running out of room, both in our house & in my crafting area in the basement, so I need to get rid of some clutter. If any "big developments" on this front happen anytime soon, I'll let you know. It's just an idea for now. :)

As I said in my last post, if I don't post before then, Happy, Happy Thanksgiving, and Happy Black Friday!! I am so, so ready for those two days! I love everything about them- the family time, the food, the cooking, the clean house (since company is coming), the laughter... then the little rest & lots of shopping on Friday, getting & putting up our tree, and all the Christmas decor being brought up from the basement to brighten up our house.

I am so very thankful this year. Each year, we have more than the last. We are blessed more & more every day, and never want for a thing. God is so good to us. We have all of our family members together once again for Thanksgiving, and that's one of the biggest blessings. Zach's dad is also coming to Thanksgiving dinner at his mom's, so his family will all be together. I keep reminding him how blessed he is for that. You never know which Thanksgiving will be your last, or how different it will be from year to year. Love your loved ones while you have them- I don't know how much I can preach that.

Always remember, there is always, always, always something to be thankful for.

Wednesday, October 31, 2012

For the Love of Chevron


Well, it's been a while. I love blogging, but I love living life more. It's great to take a break every now & then- from everything-
and concentrate on other things.

A lot has happened in our world since my last post. The weekend before last, we had a very fun, busy weekend! My sweetie got a new vehicle. It was very bittersweet, since he has always been in love with his Land Rover, but its time had come. We are very happy with our new purchase so far, and it's another great family vehicle (for now, that means lots of room for our trips, and plenty of room for the doggies on their vet visits), so we're happy. God is good. :)

We also went to our niece's soccer game that day. Never knew we would have fun while watching little ones run around playing soccer, but we did. We had a great time visiting with his family for the second weekend in a row too. We got to eat lunch at, of course, Chick-fil-A, and shop a little that afternoon. That night, we thoroughly enjoyed the Bama/TN game!! The next morning, I volunteered in the nursery & stayed for church, then got a lot done at home that afternoon. Life is good. :)

This past week was an eventful one. Our "big sister" Jen had a stroke at the first of last week (I call her that because she has always been like a sister to us- she babysat my brother & I when we were little, and I was a bridesmaid in her wedding, and she was one in mine). We never would have thought when we visited her the first night in the hospital's Neurological ICU that two days later, she would be coming home, but she did! Praise the Lord for taking care of her, and for continuing to give her a quicker recovery with each new day. Continue to pray for her as she returns back to 100%, because she will- SOON- it will just take some work. She's a fighter! Again, God is good. :)

We had a good time this past weekend- nothing was accomplished at our house, but we spent tons of time with family & friends, and at the end of the day, that's so much more important than clean laundry & a clean house. I went shopping on Saturday with Mom & Mamaw, then we watched the Bama with Zach's dad that night. We spent most of the day Sunday (after church) with Zach's best friend Brett and his sweet family.

On Sunday morning, I was asked to volunteer in the nursery again (I see a pattern here... but I love it!), then we had one of the most awesome church services we will probably ever witness. A local soldier named Josh Wetzel was injured by an IED explosion in Afghanistan, and he & his sweet wife gave their testimony. He lost both of his legs at the knees, but they have put such a positive spin on their experience. Our choir also had a show-stopping (if I do say so myself) version of When the Saints Go Marching In, complete with trombone, drums & other instruments. Wow- I was so excited!

It made me think- why don't we get this excited when every other Sunday rolls around??

Now, enough catching up...on to the project...

So, I am falling more & more in love with the chevron pattern the more I see it- and it is everywhere these days! I happened to see the cover of the October issue of Country Living magazine while at the grocery store the other day...

Google Images

Wow! I loved the design & the colors. Naturally, I decided to try
a version of these myself.

I decided not to use real pumpkins. Reason One: Because they are too pricey for what you get; Reason Two: Because I did not want to spend all that time painting & decorating to them, only to throw them out in late November. Nope!

So, on to the Dollar Tree I went. I picked up two of the same pumpkins that I got there last year (the very ones I re-designed with a little time, paint & Mod Podge). I also picked up a third (just like them!) at the thrift store, and for half the price
(yep, 50 cents).

I decided that since I had three of these to experiment with,
why not paint them all differently? 

With the first pumpkin, I painted it a white chevron pattern, letting the natural orange shine through. At first, I tried applying painter's tape, but it was too wide for the small pumpkin, and was, honestly, too much work. So, I free-handed it with a paint pen. :)


I then filled in the lines with simple white paint on a sponge brush.


I applied a clear coat on this one to protect, and then it was done!


With the second, I painted it the gray & white chevron pattern. I simply spray painted the gray, then free-handed the white chevron pattern in three lines.


I still have the third pumpkin sitting, just waiting for a transformation. I think I have finally decided what to do with it. My mom mentioned wanting one, so I plan on making one for her. I know what I'm going to do- I'm thinking scrapbook paper with Mod Podge. I will post if I ever get it done!

For now, I'm just enjoying these two myself.


Happy Halloween to everyone today! My sweetie & I have made a deal to each watch a Halloween movie the other has picked. Last night was my turn, and I thought I would have a blast from the past & watch Casper. I have forgotten how much I liked that movie. It was neat, because I remembered so many lines from it. It's a cute, non-scary Halloween movie. I enjoyed the movie while gobbling up some sausage balls I had made over the weekend...


Yum! Not so healthy, but they're so good!
The same goes for this stuff...


...not really healthy, but it warms you up so well- it just goes so well with the Fall weather we are experiencing!

Tonight is Zach's turn to pick his movie, so we'll see
what he comes up with. :)

Hope everyone has a great rest of the week & weekend...
and Roll Tide!!
Related Posts Plugin for WordPress, Blogger...