Wednesday, October 12, 2011

Fall Thrift Store Trip


Hope you all are having a good week so far, and had a wonderful weekend! Ours was great! We headed to Birmingham on Saturday, hit the mall (of course) and ate at my absolute favorite, Stix. Sushi & fried rice are what I love! Then, we watched the awesome Bama game...and the awesome Auburn game (sorry, my sweet Auburn friends- you have to get it in while you can). :)
Sunday was filled with church, and was wonderful as always!
We love our busy, jam-packed weekends.

So, I spent $3.75 at the thrift store a few weeks ago,
and scored 4 things. I love it!

I thought I would post quick photos of the things I scored- all of it being Fall stuff. I guess I can blame it on Walt Disney World, because I have wanted to add more to my decor ever since we got back home. Their decorations were out of this world, but when I would look really close at them, I would think, "I could do that!" They used just about the same materials that I did, things we all use, like leaves, pumpkins, gourds, straw, etc. They just use TONS of it. So, I guess I had Fall on the brain while I was at the shop.

First off, I found this cute little jug/vase. The greenish tint of the glass reminds me of a Coke bottle, so how could I go wrong
with that?


I added it to the little "vignette" (if you can even call it that) on our entertainment center shelves. They've been naked since we moved them into our house, and have been yelling at me to clothe them ever since. I knew I wouldn't have a shortage of crap to put on them, so I just went rummaging around the house to gather things. The best shopping you can do is shopping
around your house!


I found these cute little Cracker Barrel pumpkin salt & pepper shakers- brand new, still wrapped in box. They were originally $4.99- I got them for $2.00 with no tax. Score! Two runs through the dishwasher (I couldn't believe they are dishwasher safe, but they are- extra bonus!) & filling them up, and they were ready to go. Here they are on my dining room table:


This simple little cornucopia has Autumn written all over it...


...and for 50 cents, I didn't want to pass it up.

I put it on the other side of our entertainment center shelves to even things out. I'm a sucker for balancing things out...


I am adding another little treasure to this side tonight. I finally bought & got to use the Peekaboo Blue from Krylon that I have been wanting. A little blue pumpkin is just what this shelf needs. In this pic, you can see a little something else too,
which brings me to my last item...

I never pass up a perfect glass candlestick:


Yep, 25 cents.

 I ran by the Dollar Tree right quick after leaving the thrift shop to get this to go along with it:


A little E6000 glue, and we're in business. I still have my other two apothecary vases (shown in this post) that I am using.
This is another cheap,  unbelievably easy craft.

You would be surprised at what you can find, if you just think outside the box. I keep learning new ways to do things & put things together all the time, and I love it!

Tuesday, October 4, 2011

Dear Real Simple, My Closet Thanks You!


Can I just start out by saying I am always overwhelmed by the sweet comments I am receiving?! I especially love to check back on Mondays after the weekend, and see the new visitors & followers. Linking up my projects to other design blogs has really brought a lot of new friends to my blog, and I am loving it!! The comments always make my day, and they continue to encourage me to always have those ideas swirling around & have the passion to keep starting new projects. Thank you all so much!

Also, I wanted to mention how awesome our weekend was! My best friend Anna was in town, and stopped by to visit. I got to see her three beautiful girls, and it made my day! Alabama blew away Florida (Roll Tide Roll!!), we got to have Sunday lunch after church with our sweet friends Hannah & Wyatt, and a little shopping was squeezed in over the weekend. Speaking of, I wanted to show off what I scored at Hobby Lobby...


I consider this a thrifty purchase. My reasoning behind this:

1.) It was on sale for 40% off, and I had been eyeing these
for a while now.

2.) I kept thinking about how much I always end up spending on real pumpkins/gourds/etc. every Fall, and then have to throw them away at the end of the season. This would totally eliminate that. I would use this one every year!

Thus, I think it's a money saver in the long run, so it came home with me! :) (Zach loves how I always try to reason out my purchases. It's a habit I have to live with.)

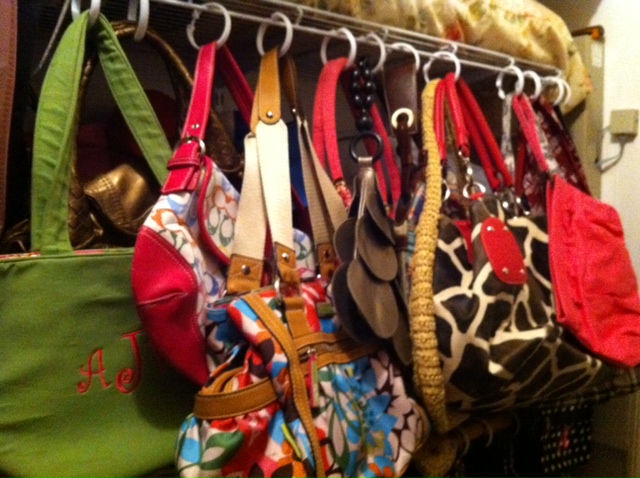
So, back to my post topic...I saw this awesome idea in an email from Real Simple. I subscribe to their magazine, but their emails share even more good little ideas, mostly on home organization. This simple idea is using shower hooks as purse organizers,
and I love it!

We have a great walk-in closet in our master bedroom, but it seems like it's always filled to the brim. I feel like I don't really maximize all the shelves & rods, and this is a great way to do that.

I had cleaned out and tried to re-organize our closets a couple of months ago. Basically, we have three closets in our house (one in each of the three bedrooms). In one Saturday, I went from:

Closet #1: containing all my pants, capris, skirts, dresses & coats
- Closet #2: containing all my tops
- Closet #3: containing my shoes & purses, and ALL of Zach's stuff (yeah, I got 2 1/2 closets & he got one)

...to this set-up:

- Closet #1: containing NOTHING!...(well, nothing clothing-wise...used for storage only)
- Closet #2: containing what old #1 had (pants, bottoms, etc.) plus my shoes, on the floor on neatly organized shelves
- Closet #3: containing my tops & purses, along with Zach's stuff

Not too shabby for one Saturday, I thought.

But, our main closet (Closet #3) had all of these neat shelves & rods that still weren't being used. I now have my tops on one rack that was completely bare in the beginning. My purses were taking up space on shelves, but thanks to Real Simple's little article, they are now hung with handy shower hooks on another rod that was not previously being utilized. Those shelves that once housed them are now freed up. I'm sure I will find something
to put on them though. :)

It feels great to be using all of this space & extra storage features that were not otherwise used before! And all it took was a quick trip to the dollar store to buy them ($1 for a pack of 12,
and I only bought two).

I wanted to include the link to their article here.
They also give many other great ideas for storage.

I am going to swallow my pride here and show you two Before pics (thank goodness they are Before pics!), showing the beautiful disaster that was my pile-o-purses, along with some clothes mixed in. I can't believe I had all of this wasted, unorganized, ugly space before!

BEFORE


Ugh, embarrassing! Notice I sized the pics smaller, because I can't stand to have a bigger shot of that on my blog. :)

Now, here are the After pics of my organized little array
of hanging purses:

AFTER


I can even still use the shelf space behind the purses, so it doubled the utilization of those shelves! The last pic shows the completely empty shelves that I now have on the other side of the closet.
Ahh... much, much, much better!

Friday, September 30, 2011

Comfort Food


I would categorize the following two recipes simply as comfort food. They are both easy crockpot recipes. I really look forward to the cooler Autumn weather when I can cook up big pots of soup, chili, or stew and have it waiting on me when I get home!

Speaking of, I did that this past weekend with this new recipe from
this post from Thrifty Decor Chick. It was great for a Sunday too. I started up the crockpot before church, then came home from children's choir to have it ready. Zach fixed his famous cornbread to go with it, and it was wonderful!

Creamy Chicken & Wild Rice Soup

- 2 boneless, skinless chicken breasts
- 2 cups water
- 4 cups chicken broth
- 1 carrot, chopped ( I used a small can of mushrooms instead)
- 1 box Rice-A-Roni Long Grain & Wild Rice
- 3/4 cup flour
- 1/2 tsp salt
- 1/2 tsp pepper
- 1/2 cup (one stick) butter
- 2 cups (1 pint) Half & Half

Put chicken, broth, water, mushrooms, & wild rice (with seasoning packet) in crockpot & stir. Cook on Low for 8 hours, or on High for 4 hours. Around the 2-hour mark, break apart chicken pieces.

When done, in a small bowl, mix flour with salt & pepper. In a medium saucepan, melt butter. In small amounts, add flour mixture to butter. Stir to create a roux.
(Love that word.) :)

When mixed, slowly add in Half & Half in small amounts. (I poured in really small amounts, all while stirring.) Fully mix- it will be a gravy-like mixture. Then, add roux mixture to crockpot mixture & cook on Low
for 15 minutes.

You may also add more broth to thin soup. (I added about a cup more of broth, and it was perfect.)
It serves about 8 good bowl fulls, I believe. Plenty for both of us for two meals & some to Mom. :)

I took a quick picture of the soup when it was done:


I mixed mine with Zach's cornbread, and it was so good!!


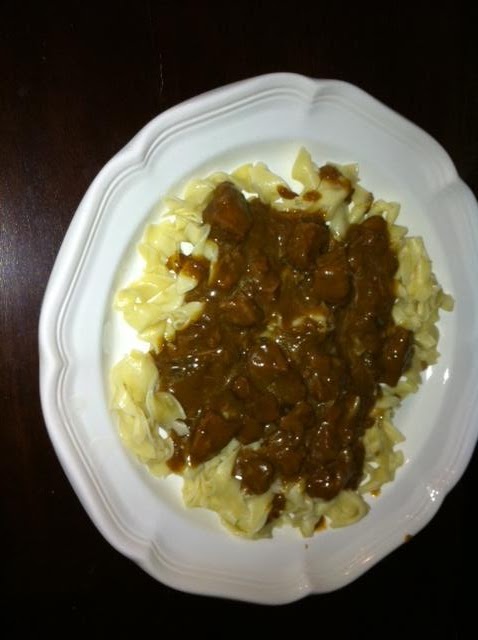
The second recipe, I picked up from a Facebook group called Crock Pot Girls. If you haven't checked out their page yet, you need to! They have tons & tons of crockpot recipes, along with lots of photos, which I love. I tried this one out a couple of weeks ago, and we both loved it! Their name for it was "Manly" Beef Stew, but my version was "Manly" Beef Pasta. It is "manly" because it has no veggies. Who needs healthy carrots & potatoes anyway? :) I am planning on trying out more of their recipes soon. I realize I don't use my crockpot enough!
They are a working girl's best friend, you know!

"Manly" Beef Stew

- 1.5 lb. beef stew tips (This would probably serve 3 good helpings, so use more if needed)
- 1 can cream of mushroom soup (golden mushroom is recommended)
- 1 can cheddar cheese soup
- 1 packet Lipton beefy onion soup mix (I didn't even know the beefy onion mix existed)

Put all ingredients in the lovely crockpot, stir, and cook on low for 8 hours. Serve over rice or pasta.

How much easier can you get?? It is so great to walk into the house at the end of the day and smell this cooking, just knowing you can eat in a few minutes! I used egg noodles, which took no more than 10 minutes to cook, and poured the stew over them, mixing it up. It was delicious!


Hope everyone has a great weekend! It looks like I have a weekend of shopping, football & church, so I'm a happy girl! :)

Wednesday, September 28, 2011

Quick Change Artist


The "quick change artist" I'm referring to is my best project friend, spray paint. Just wanted to share some Before & Afters of easy, quick transformations in a matter of minutes,
simply made with spray paint. 

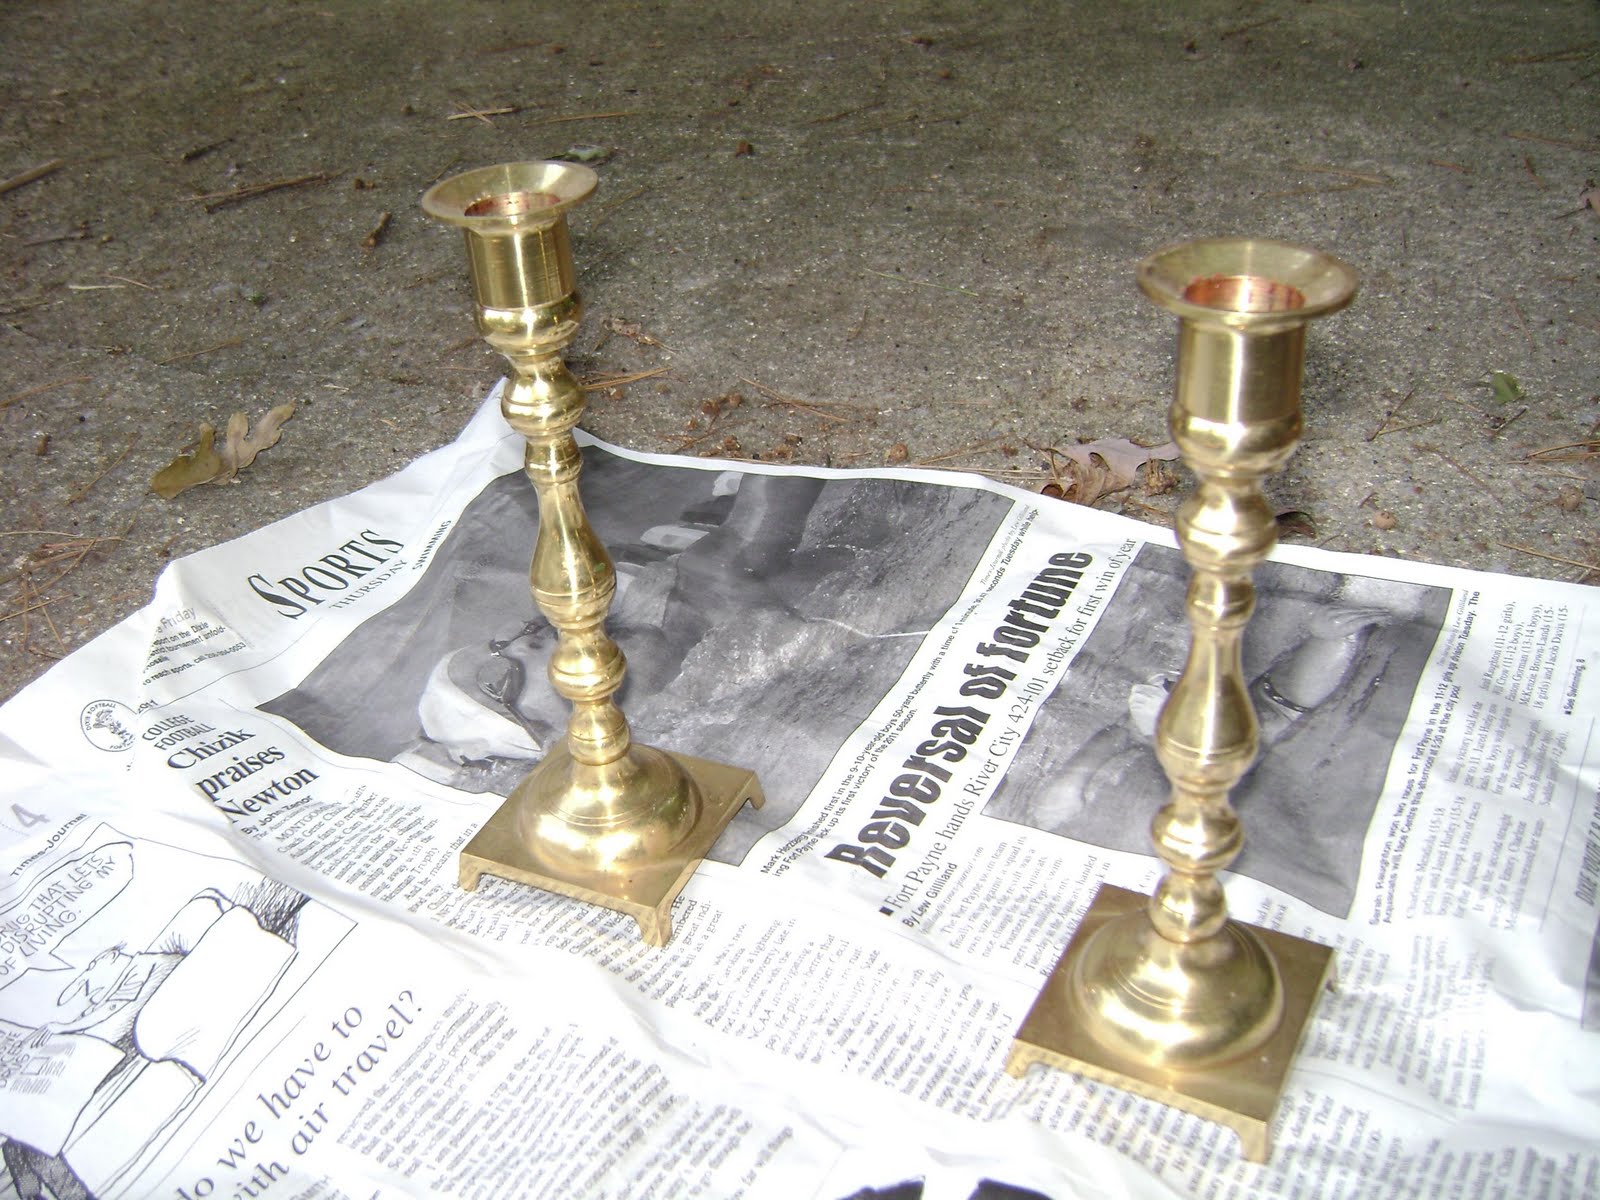
This is the third time I have purchased candlesticks at the thrift store. Why do I always have to get these??
I just can't turn them down if they're in good shape.
These were brassy & looked old-fashioned
when I bought them:


Now, they're an updated, bright silver:


(You can tell I did these forever ago- the "J" on the china cabinet is gone & the rugs have been replaced with new ones.
I like looking back at old pictures & seeing changes.)

These were the ones I used for my "headless horsemen" here:


I still laugh when I look at them. :)

I may hit these with the blue spray paint I had mentioned in my post here. That's the beauty of spray paint- if you don't like it, get tired of it, or just want a change, you can spray it with new!

These napkin rings were bought on one of my very first trips to the thrift store many months ago. They were $1.00 for the set of 6, so I couldn't resist. They are were an ugly mauve,
and some have had blemishes:


I have had the idea for their transformation for a while. I really want to finish them off by painting a silver "J" monogram on each one, but I'm not that good. I am too much of a perfectionist to free-hand letters & I couldn't find the right stencil,
so I will do without for now.

I sanded the heck out of them, most of the ugly pink/mauve paint came off & the blemishes were no more. I then sprayed them all with a golden metallic paint. So easy! These will look great with my gold chargers, especially at Christmas time!


I think they look so much better than the old, darker wooden ones I had before...


Anyway, just a quick post to show my love for spray paint.
Today is Mamaw Ruth's 91st Birthday!! It's her first birthday without my dad in 55 years, so say a little prayer for her today!

Monday, September 26, 2011

Calendar Vinyl


Yet another No-Spend July project that I have just recently wrapped up! Let me tell you, I have had the stuff for this project for a really long time. I think I was honestly just a little nervous to use the vinyl. I was so afraid I wouldn't get it on straight! It did turn out to be a pain in the you-know-what, trying to get it straightened, lined up, all while smoothing out the air bubbles, but I love the way it turned out!

I had ordered a cute little calendar vinyl from a GroopDealz email a long time ago. This is the second time I have ordered something from them, and I love how it works,
not to mention the great deals!

I had the project finished, but then wanted to change it up.
So, I'll do a little something different here and go ahead
and show you the final product...


I love it!!

Starting off, I knew I would have to find something to put the decal on. The instructions that came with the vinyl said it could be placed right on the refrigerator, but I knew how that would end up. We would have a white fridge covered in dry erase marker that I would constantly be cleaning. I always want to try to repurpose something I already have instead of buy something new, if at all possible. (Keep in mind, this began as a No-Spend July project). So, I rummaged around the junk room guest room for something to use and found this little prize:


Haha! This was taken over 8 years ago now, by the way. Ugh, makes me feel old! Needless to say, this hasn't been hung up on a wall in a long time. It came from Zach's old room at his dad's house. Aww. :) I took the photo & glass out, spray painted the frame in black (free, taken from Mom's- also used on the jewelry tray makeover project) and covered the backing with red posterboard ($1 for 2 at the lovely Dollar Tree),
then stuck the vinyl on the cleaned glass. 

Here are the steps:

I removed the glass from the frame first and cleaned it. Then, I spray painted one coat of Krylon Gloss Black on the frame.
One coat was all it took.


Then, I had to find a large enough piece of paper for the backing. I was perusing the Dollar Tree and found posterboard. I wanted it red to give it a little color. I then carefully stuck the vinyl on the glass (easier said than done).

 
I looked at it, and kept thinking about changing up the background paper. I really wasn't loving the bright red in the area I had planned to hang it up. It's so easy to change up the background too, if I ever want to change it again in the future. Who knows, if I'm feeling really crafty, I could use coordinating scrapbook paper and decorate for all seasons. Ha, big "IF."

I remembered the lovely zebra print paper that I have used on many projects already, including the projects here, here and here. Love that linky tool. :) So, that brings us to finished product once again...


I'm wanting to create a little organizational hub in the laundry room- somewhere to put loose important papers & keep up with important dates. One laundry room wall is completely empty & it's the perfect place, because it is usually only seen by me & Zach. So, my calendar is now waiting to be hung up in our laundry room (ahem, Zach), along with a framed corkboard that I bought probably about a year ago now. Things aren't hung up on the walls in our house very often, as you can tell. :)
 

Wouldn't these look great hung up on the wall near each other? Maybe soon! :)

Friday, September 23, 2011

Roll Tide!!!


I am so happy to say that I have gotten back into my crafting groove after vacation. Maybe that was just what I needed to get out of my rut. Last night, I both started & finished the Bama door hangers for me & Mom that I had mentioned in an earlier post.
It felt so good to paint & get my hot glue gun heated up again.
I hope to keep it up!

I'm so excited about this easy little craft that I'm going to go ahead & post a pic of the finished product first off...


Love! :)

So, I guess I took the easy way out on this project, but Mom & I still like the finished product. I wanted to sketch out the actual script "A" onto burlap or some material like that, but I got lazy.
I found these letters at Hobby Lobby instead:

 
I also grabbed up some pretty crimson acrylic paint
while there too:

 
I went to town painting the "A's". This shows after just one coat:


I ended up painting three coats, to give it a richer crimson color.
I used the houndstooth ribbon & bows that we had from one of Dad's gorgeous arrangements. I'm so glad we're getting to use some of the things from his arrangements. I would much rather have them to enjoy than to have thrown them away.


And here they are, in all their Bama glory...


Love that side view!

I hope to post Zach's Disney pics soon!! We took so many really good ones- my favorites are the ones of the beautiful castle & us with the characters we got to meet! As I mentioned in my last post, it was a perfect trip- we got to do everything we wanted to do...except relax. But, it was worth every minute!

And, just to stick with the Alabama theme, I wanted to include a pic that Zach took of us before the first Alabama football game
of this season. :)

Thursday, September 22, 2011

A Magical Anniversary Trip


WARNING: Picture Overload :)

Do you want to be treated like royalty on your special occasion (birthday, anniversary, etc.)? Then simply go to Walt Disney World! We had an AWESOME time on our trip! It was our best Disney trip yet. We were able to fit everything in that we wanted to do, and even a few things we had never done before! We got to meet Mickey, Minnie, Donald Duck, and the Disney princesses!! We wore our "Happy Anniversary" pins, which gave us countless shouts of "Happy Anniversary!" everywhere we went, and we even scored a few free things, including yummy desserts!
It was, in one word, MAGICAL!

We went to Mickey's Not-So-Scary Halloween Party & loved every minute of it! We saw the parade with the headless horseman that actually rode on Main Street on his horse- amazing! We took the candy trails and were handed loads of yummy candy.
We both filled our bags full!

I would have to say my favorite part was getting to meet the characters. I couldn't believe we had never done this before, as many times as we have been, and it was so easy! We waited until the afternoon, I guess when most of the kids had already crashed for the day, so we were only in line (in an air conditioned room) about 10 minutes. We met Mickey & Minnie, which was so fun, Cinderella (my favorite princess!), Belle from Beauty & the Beast (Zach's favorite :) ) and Sleeping Beauty (Aurora, I think it is).
We had met Donald Duck earlier that day.

We also both got to be the "spies" on Star Tours (we had our picture on the screen during the ride)- I couldn't believe we BOTH got picked to do this at two separate times! We were shown on the big screen during the Monsters Inc. Laugh Floor comedy routine. This is our second time to be shown on the big screen, which was really neat. We also were called on by a "cast member" (Disney employee) to come up to the front before the Hall of Presidents show. The sweet guy said he had a phone call for us, so we both picked up the phone and listened to Mickey & Minnie wishing us a Happy Anniversary. It was so cute! He then asked us our names and he wrote them out, along with "Happy 3rd Wedding Anniversary" in beautiful calligraphy on a Disney card that said "You will always remember this day at the Magic Kingdom."
I can't wait to frame that!

I wanted to include some of our favorite pics. These were all taken on my phone, but Zach took his camera along, so more awesome pics are on the way. Plus, we really took advantage of our PhotoPass (we get a free photo book included in the package), and those turned out great. We'll post those once we get them! Also, Facebook now has a public link you can use for all photo albums, so if you want to check all of my phone photos out,
here are the two links:

The Fall decorations made me want to go home
& add to mine some more!

Zach's favorite- The Haunted Mansion

Me & my sweetie about to go enjoy our anniversary dinner

Zach got to meet Chip...or Dale

He also learned how to play this thing...

On the Magical Express, about to leave :(

My favorite- Tower of Terror

We LOVE this!

And, you can't forget the yummy food...

Zach's dinner at Fulton's Crab House- Lobster Naragansett

...and mine, Alaskan King crab legs- nothing better!

Crabcake California roll...yum!

One of our FREE desserts from Kona Cafe. We loved this!

Burger with shrimp...yes, please!

Another FREE dessert :)

Courtesy of Pecos Bill...

Yummy Mickey

Sorry so many, but I hope you all enjoyed them! I will try to post the others (especially the ones of us meeting the characters) soon!
Related Posts Plugin for WordPress, Blogger...