Showing posts with label Recipes. Show all posts

Tuesday, April 30, 2013

Skinny Philly


I am determined to get back into blogging. Life has just been a little crazy lately. All good things- just a lot of them. Aside from the HUGE task of helping my mom plan her upcoming wedding, along with the changes in her house that are being made, we also have some changes happening in our household.

These are very minor compared to hers, but they include furniture changes (which is pretty big for us), and two new TVs. This isn't as simple as it sounds, unfortunately... We started by ordering a new TV. We only bit the bullet on this until our old, trusty big screen went out on us. We had always said that we would not buy a newer TV until our old one bit the dust. A few days ago, it started going out every few minutes, so we couldn't take it any longer. Although it's been exciting to step into the year 2013 and actually own a HD set, it entails a lot of other things. We also have to get a new satellite dish, a new DVR box ("The Hoppaaa," as they call it on the commercial), and a "Joey" hookup for our master bedroom TV (which is also new, thanks to my grandmother).

And, since our old TV was humongous, we then had to have a new piece of furniture to put the new, sleeker TV on. That was a task in itself, that took up most of our day on Saturday, spanning about 5 different store stops. But, we decided on a beautiful piece, and my sweetie hauled it in the house & assembled it all himself. :)

So, anyway, life lately is hectic, but good, to sum it all up. :)

Now, you are going to love me for sharing this recipe! I have made it several different times now, and it is now one of our favorite go-tos for a quick weeknight meal. I found the recipe here.
Thank you, Skinny Ms.!!!

It is basically a quick, healthy version of a Philly cheese chicken sandwich. You could make it even healthier by subbing olive oil for the canola oil, which I did.

What you will need:

- 2 one-pound chicken breast filets (I used an already-cooked rotisserie from the store... even easier!)
- One tbsp. canola oil
- One tsp. dried oregano (optional)
- 1/2 tsp. black pepper
- Salt (optional)
- One bell pepper, sliced (recipe calls for red &/or green)
- One onion, sliced
- Provolone cheese (I think the second time I cooked this, I only had Swiss on hand, and it was good too...not as good as the Provolone, but still tasty.)
- Crusty sandwich bread, hoagie rolls, etc.

Preheat oven to 475 degrees. If you need to cook the chicken- mine was already cooked, so I cooked my veggies first, then added the chicken for a minute to flavor it- season it with salt, pepper & oregano, then brown it in the oil. Add peppers & onion, and cook until tender.

Put rolls on cookie sheet, open-faced, place chicken/pepper/onion mixture on rolls, place cheese on top & bake until cheese is melted.

So simple!

Step 1:


Step 2:


Step 3:


Step 4:


Step 5:


Step 6:

I paired our sandwiches with some Checkers fries, found in the frozen section. These are the closest to Central Park (our favorite) we've had! Yum!


I've also fixed the sandwiches with my own homemade fries, which are hard to beat. 


Monday, February 18, 2013

Simple Sausage Ball Recipe


(Not too bad for an iPhone picture, right? I was shocked at
how well it turned out.)

I made these little cuties over the weekend. It was one of those snacks that I had been craving for a while, and I (surprisingly) already had the ingredients for it on hand. I had made these not too long ago for the National Championship game, and I've made them a few times before. They're so easy!

The recipe I have been using recently came from All Recipes with just a simple Google search.

The three ingredients are 1 lb. sausage, 2 cups Bisquick, & 1 lb. sharp cheddar cheese. (It was A LOT of cheese, so I didn't quite use all of it.)


You first preheat the oven to 350 degrees. Then take the sausage at room temp & place it in a bowl.


Then add the 2 cups Bisquick. I thought this added just enough breading- you may want to add more if you like it more "biscuit-y". Knead it through the sausage. This gets messy, but it is best done with your hands.


Then add the yummy cheese and knead through!


At this point, it looks incredibly unappetizing...


Once well-mixed, take small amounts and form them into "walnut-sized" balls. I covered my baking sheet with foil & greased the foil. The bottoms turned out lightly browned- perfect!

The recipe says it yields about 30, but mine went further.
I made 48 total.


Bake at 350 for 20-25 minutes. (I went the full 25.)


To me, they are best right out of the oven, but you can reheat them anytime- it only takes about 10-15 minutes, again at 350 degrees.


I know this is a simple recipe that probably everyone has tried at some point, but to me, it makes it more interesting with pictures. I hope to do more recipe posts like this this year... it's just a little difficult to have the phone or camera in the kitchen with me when I'm making a mess cooking. (Not to mention, I'm sure my hubby thinks I'm an idiot snapping pictures of food.)

Hope everyone enjoyed their weekend! Mine was full of rest & relaxation!

Monday, July 30, 2012

The Quickest, Easiest Corn-on-the-Cob


This is a tip from my grandmother that I wanted to share, just because it's awesome! She had told me about this a few weeks ago, and warned me not to be skeptical, because she was when she first heard this tip. I took her advice, and thought I would try it out
for myself.

First, you gather your fresh corn, still in their husks...


You then cut off the stalk end...


Then on the other end, you pull the major part of the husk out,
or cut if off...


Place in microwave, still in husks (no plate or paper towel is needed, just place them directly on the surface)...


Cook for 4 minutes in microwave...


Wait and let them cool for about one minute, then bring them out of the microwave. Be super careful, because they are still hot, then easily remove the husks & silks.

You will be amazed at how easy all the silks slip off, and how perfectly moist the corn turns out to be!!


Now you're done! After 4 short minutes, the corn comes out perfectly- no pre-soaking, no wrapping with foil- just by cooking the corn in its own natural husk. Amazing!

My own personal favorite is still our grilled corn-on-the-cob, but this is a close second, and it's a time saver for those quick dinners.

******

Now, for confession time. I went to Hobby Lobby (ahem, in July... I know, it's awful that I can't go one month , but I failed by about 3 days), and got a few crafting things. I know that I am only accountable to myself in No-Spend July, but I was still a little disappointed. I reasoned the purchases out though (as I always do), because I knew that I wouldn't be making a trip there for a while, and had a few deadlines for projects coming up (I'm making a few gifts that I'm really excited about). I would rather have projects done than keep the No-Spend July going and not have any supplies. In the long run, I would be saving money because it would save me another trip. So, that's my confession.

Does it count if I haven't used any of the materials I purchased yet? I may wait until August, just to make myself feel better. Oh well. :)

My sweetie & I enjoyed the day Saturday with a little day out & watching Dark Knight Rises. Wow, was it good!! I highly recommend watching it!

On Sunday, we had a great morning at church & then rested most of the afternoon. Later that day, Zach went outside to work and I went to the basement to craft. We are doing well with getting a lot done on the weekends, so I hope we can keep that up.

I snapped a few pics of the babies over the weekend,
so I'll end with those. :)


Thursday, July 26, 2012

"Fat-Burning" Veggie Soup


I hope you're all having a good week so far- it's almost done! I think my sweetie is going to take me to see Dark Knight this weekend, so that's something to look forward to. I love having get-away days! And I would LOVE to squeeze in a trip to Hob Lob too, but I know I can hang in there just one more weekend. This No-Spend July is killing me, and I've even been more lenient on myself this year compared to last year, "allowing" myself to buy clothes...
but, it's still killing me.

So, this is one of those "so-called fat-burning" recipes. And I can tell you how it burns fat- I think I burned 10,000 calories just by chopping up all the veggies for this recipe!

 I got the recipe here, from All Recipes. It is just a basic veggie soup, with virtually no fat. It is comprised of all veggies (I have read you can pick & choose other veggies to include/exclude, just not potatoes or beans.) I am definitely a soup girl & I love almost all veggies, so this was right up my alley. It makes SO much- I gave a batch to my mom, stocked some in my freezer, and still have plenty left. I hope to keep it stocked up, especially
for Fall & Winter coming up.

Here's what you'll need for the soup (this makes 15 servings):

- 5 carrots, chopped
- 3 large onions, chopped (it's a lot!)
- 2 16 oz. cans whole peeled tomatoes with liquid 
(I just used one big can)
- 1 large head cabbage, chopped or shredded
- 2 green bell peppers, diced
- 10 stalks of celery, chopped
- 1 15 oz. can of green beans (the only bean you can use)
- 1 1 oz. envelope of onion soup mix
- 2 qts. tomato juice (I used V8 for even more veggies)
- 1 14 oz. can beef broth


After you gather all of your ingredients, you then waste your life away chopping them all. :)

Once chopped, I added them all into one big pot.

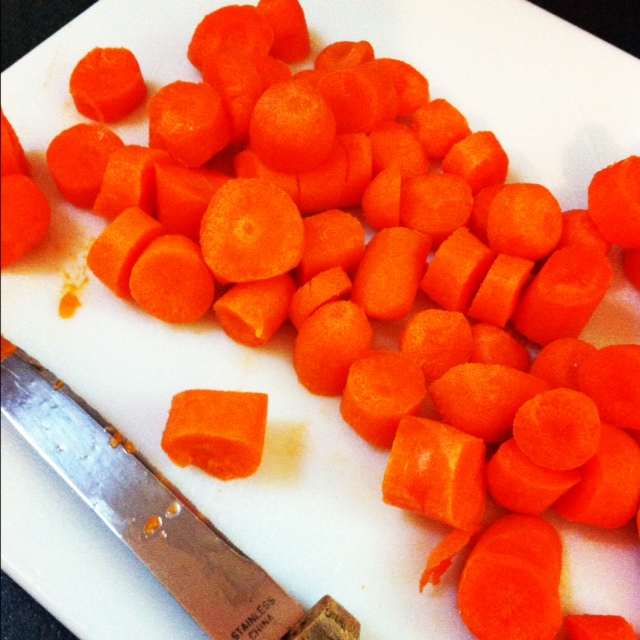
First, the carrots...


Then, the onion...fun!...It really wasn't that bad with my little chopper...


Then, pour in the tomatoes with the liquid...


Then the cabbage, which I just shredded instead of chopped...


Next, the bell peppers...


And the chopped celery...


Add the can of green beans next (I forgot and included the juice anyway, but I love a lot of broth, so it worked out)...


 After all veggies are simmering in the pot, add the envelope of onion soup mix...


Then, add the 2 qts. of tomato juice, or in my case, V8.


Finally, add the can of beef broth...


And, since I love a lot of broth, I added about 3 beef bouillon cubes along with the 3 cups of water to the mix. The recipe also says to add enough water to cover the veggies, which is not much.


You just cook the soup until all veggies are tender. The recipe actually stated it took 25 minutes to fully cook, but that was not the case with mine. I let mine simmer about 45 minutes.

And here's my finished product simmering away...


Monday, June 25, 2012

Fruit Cobbler Recipe


We had a great weekend! I got all the laundry done, moved a lot of my crafting things to the basement (hopefully that transformation will be in my next post!), enjoyed church on Sunday, and tried a recipe that I have been wanting to make for a long time.

This is one of those invaluable family recipes. My grandmother (Mom's mom) makes the best fruit cobblers, and I pinned her down one day with an index card & pen, and asked for the recipe. Like most recipes from our grandmothers, she had it all memorized. It's so easy, but so yummy! And, it's from scratch, so it's worth bragging about. :)

Mamaw Helen's Fruit Cobbler Recipe
(My Version is Peach Cobbler)

-Ingredients-
  • fruit (peaches, berries, etc.)
  • one stick butter
  • 1 cup sugar
  • 3/4 cup flour
  • 1/2 cup milk
Peaches...


Cut up the peaches...


Cover with a little water (or if canned, add juice from can), and sweeten to taste.


Stir fruit, water & sugar...


Heat up fruit in microwave (or on stove top) until warm...


Take your 1 cup sugar, 3/4 cup flour & 1/2 cup milk...


...and mix together in a bowl...


Melt one stick butter in microwave in bowl you want to bake cobbler in...


Pour sugar/flour/milk mixture into butter. DO NOT STIR!


Add fruit on top. Again, DO NOT STIR!


Bake at 350 degrees for 1 1/2 hours. Your house will smell amazing!!

Also, a little tip my grandmother gave me (after my first attempt), when there are 10 minutes of cooking time left, you can melt a small amount of butter & spread on top. This makes for a crunchier (and less healthy :) ) topping. Also, I ended up baking mine about 10 minutes more than the time given, because it didn't look "done". I was so happy with my first attempt at this awesomely easy recipe (and Zach was too)!


Yum!
Related Posts Plugin for WordPress, Blogger...